PORTLAND SNOWPOCALYPSE 2021

 
IMG_0842.jpg

Last week Portland experienced it’s worst snow storm in over 40 years. As with all snow here it seems, no one ever knows what really expect. It started with a light dusting, into a blizzard, then to an ice storm. I had never seen ice like this before. Though beautiful, the ice caused so much tree and property damage throughout our and surrounding counties taking down power for hundreds of thousands. Our thoughts are our for restoration for those STILL without electricity and internet, along with those going through much more in Texas.

Here is a little photo recap of our neighborhood - including frozen margaritas for our neighbor’s birthday!

FRIDAY

image (2).JPG
IMG_0639.jpg
E0A5E2FA-4A4C-4B39-8F50-7D328E255338.JPG
IMG_1074.jpg

SATURDAY

IMG_0736.jpg
IMG_0747.jpg
IMG_0752.jpg
IMG_0789.jpg
F9E614AB-DC27-4891-B0F0-267FF2915560.JPG
IMG_0834.jpg
IMG_0872.jpg
IMG_0867.jpg

SUNDAY

IMG_0913.jpg
IMG_0910.jpg
2B533C09-8B97-484B-A82B-E7C427890BDD.JPG
779FB5D3-D8DE-41A7-8AC7-BD61B3E9ED16.JPG
23AC088F-D5EC-457B-A4B4-B3E31E4CD6FF.JPG
E9550870-50AB-4135-898B-F74B0AA14B68.JPG
IMG_0929.jpg
IMG_0950.jpg
IMG_0947.jpg

MONDAY

IMG_1023.jpg
85850388-EDED-4E25-89A7-3E52C8632D05.JPG
IMG_1028.jpg
IMG_1024.jpg
IMG_1044.jpg
IMG_1072.jpg
 

Follow

OUR LIVING ROOM : UPDATES

 
3E9AC02C-CD1D-436B-8149-E41C70CB31E9.JPG

So it’s been about six months since I have posted any updates on our house. And mostly because it has been that long since we have gotten around to making any changes. Here we go!

WINDOWS

OMFG THE WINDOWS. The most anticipated thing of 2019! For the past year I have felt like a broken record about these! After what seemed like it was never going to happen when with our devastating breakup with our previous contractor: They are in! And they are beautiful!

Snapseed.jpg
96D1E922-0649-474C-B8BF-08E13DE7EA17.JPG

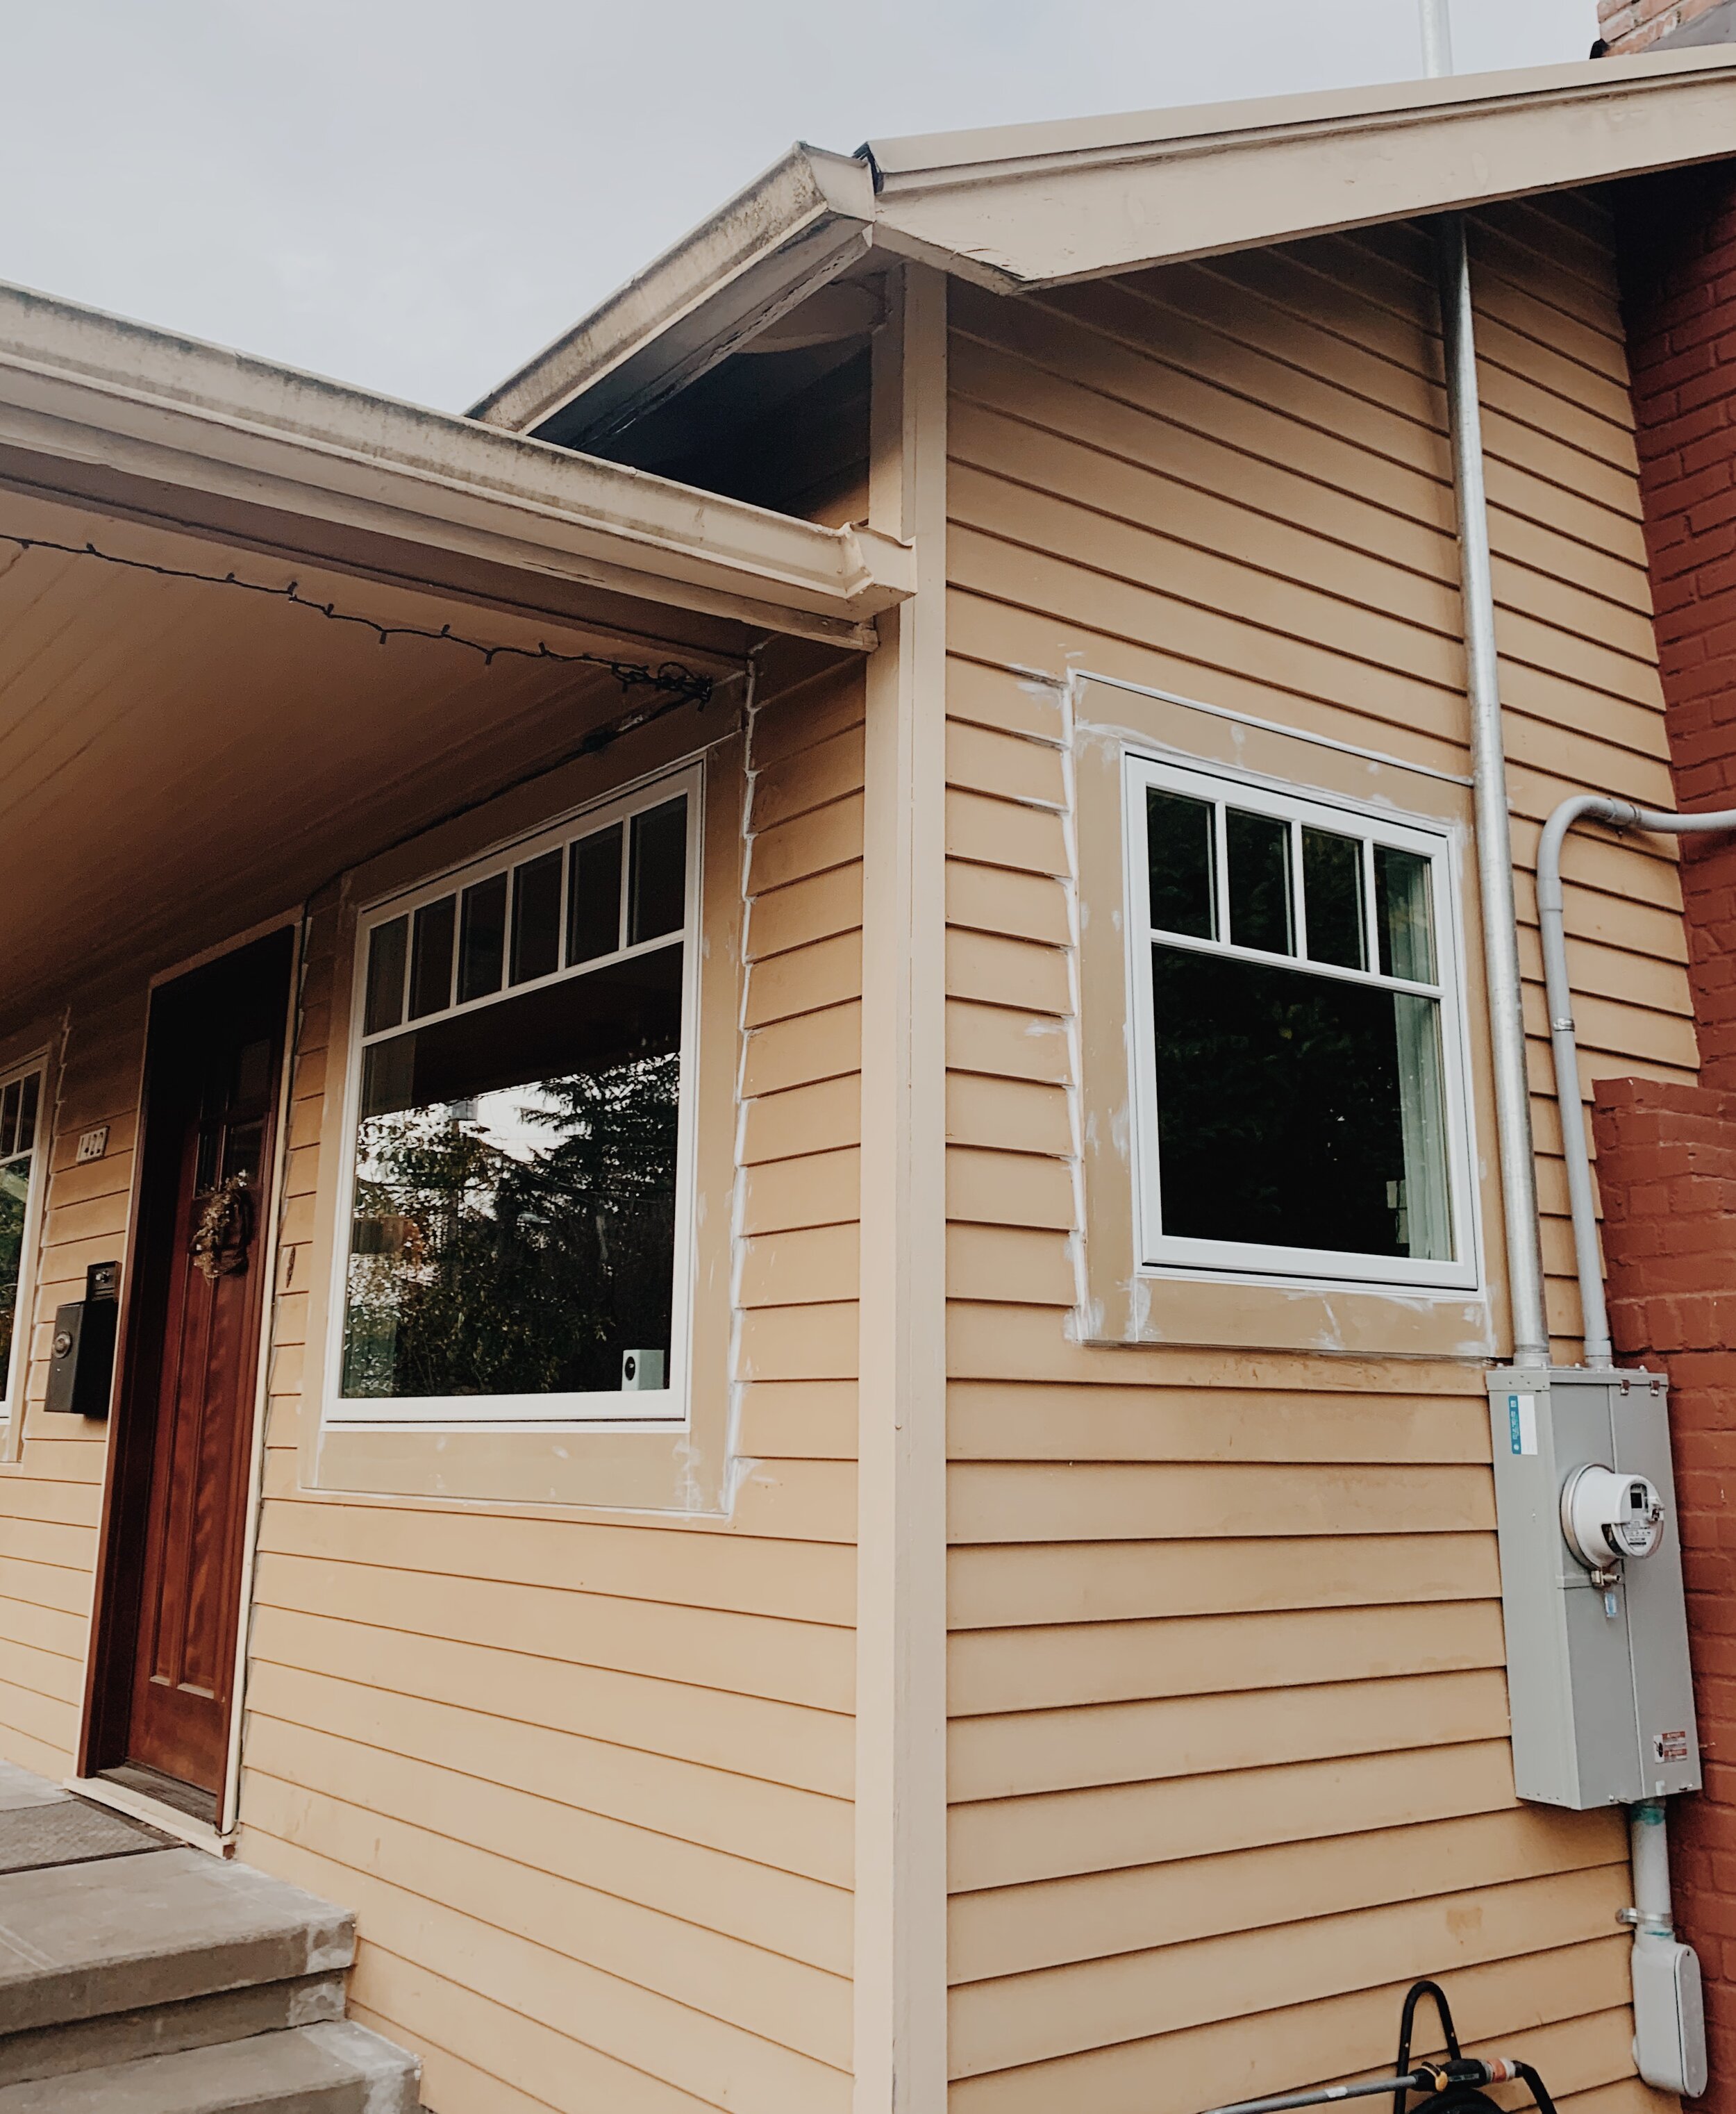
Why was this such a big deal? The windows that came with the house were from the 70’s with aluminum framing that let cold air in and were so fogged in places from moisture getting between the panes that they were worthless. I got some mixed opinions about removing the garden windows but I honestly hated them (believe it or not) and am so happy they are gone!

040B325B-0999-4CB8-BC81-5B37875BFA32.JPG
0417C377-A7CB-4D10-B854-D0A7AE8E829D.JPG

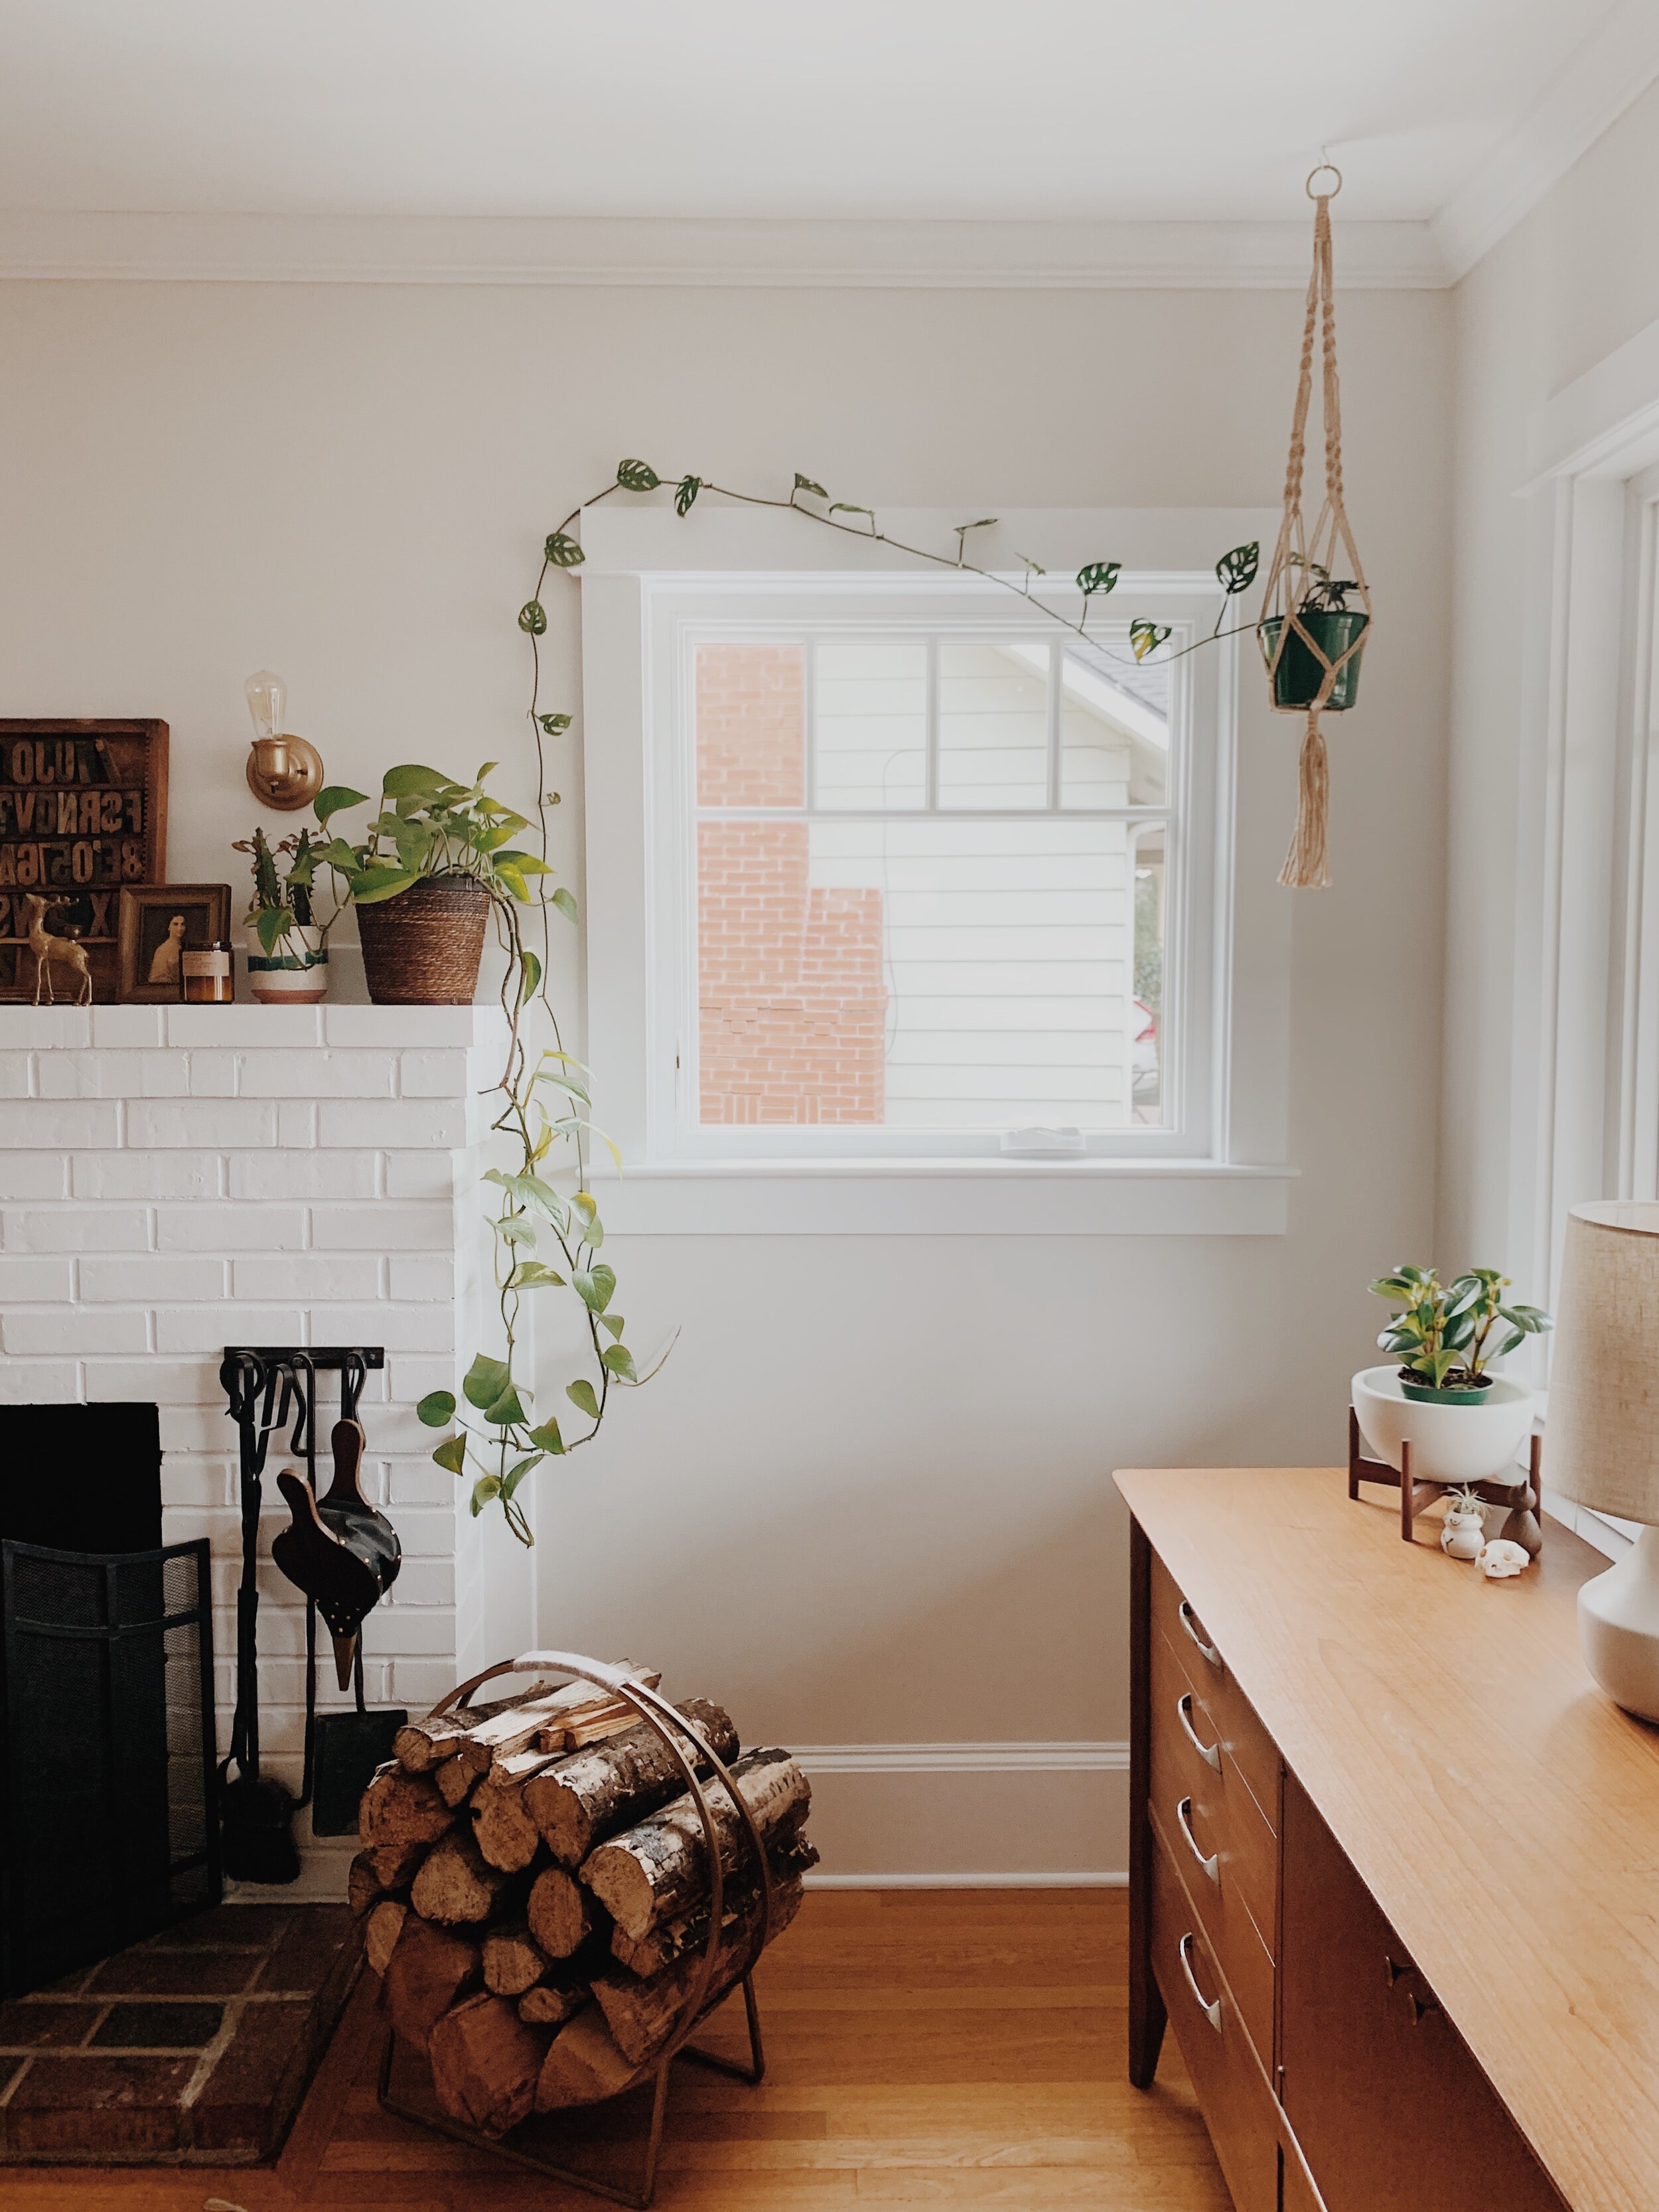
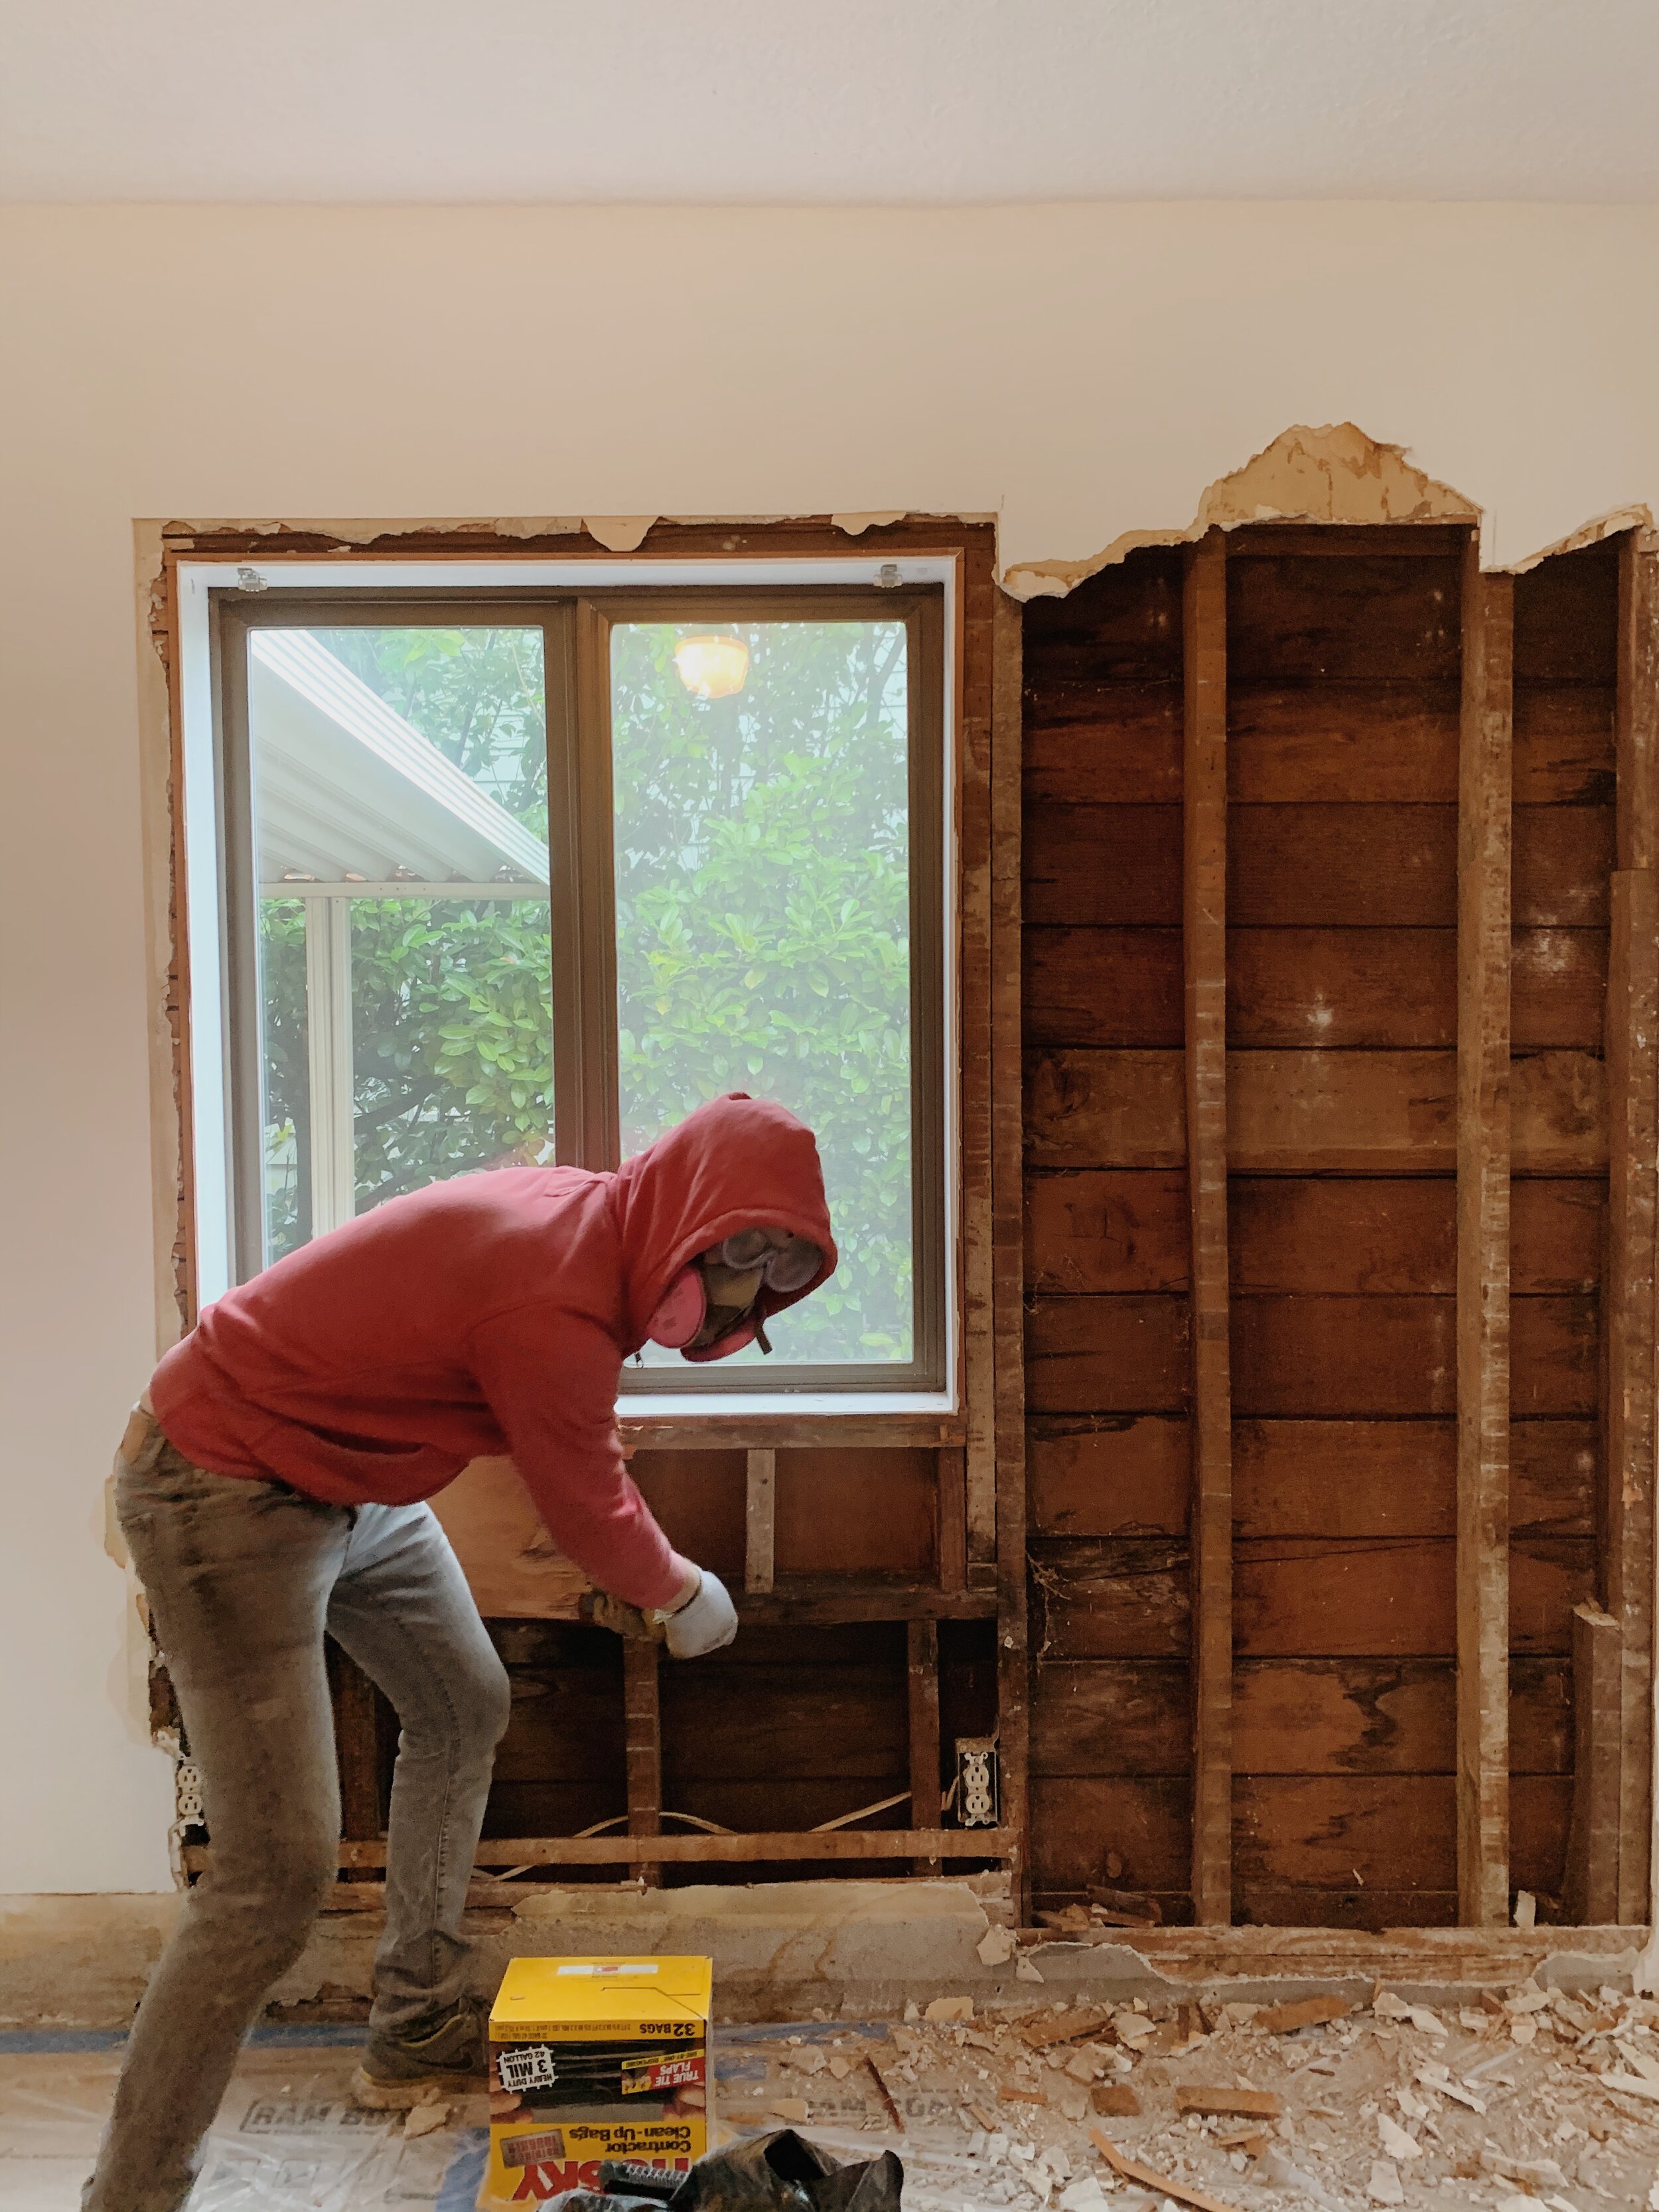
The third window on our main living room wall was the biggest change. It was different size than the other two so we decided to shorten it a bit so they are aligned. I struggled with this idea at first because being in Portland, you want as much a light as you could get. But turned out to be just fine - just as Danny reassured me. The fun part about this was that since we were going to re-frame this window we got to demo the wall for new dry wall. And it’s a good thing we did, too because once we got in there we discovered that there wasn’t an insulation! Again, and another reason why our house always seemed cold and drafty. AND we found the ORIGINAL deed for the house in the wall! It was pretty damaged but were able to make out the original sale price of $4900 in 1924. So cool! I hope we find more hidden things in the walls later and I don’t mean bones. Where’s my can of cash???

437C23FA-E052-4DB1-93E8-D8DED505E974.JPG
9926D174-9E7F-41EF-B6D1-346326D24CD8.JPG
82215810-152D-4063-A4B1-6AE41EBEFD5A.jpg
ED902AAE-FA1D-4CFE-875D-802CE5B0E8D3.JPG
AAD36678-DA3F-4B73-B550-C62F36A364E3.jpg


We matched the new windows with little stair window from Marvin through Parr Lumber and they are a dream! Since we are working on having the house match its 1920’s origin while modernizing, we picked the divided lights to be real wood on the inside and the fiber glass on the outside for weathering. And in the original style, we have the two front to just be non-functional picture windows, then the two flanking the fireplace to be opposing casements and lastly the one near the kitchen to be an awning which I think is so fun. Now, I can’t wait till warmer weather and to have all the windows open! Plus the plants are going love it!

C321DA45-21F4-4226-8B67-A9AA7531DA94.JPG

CEILING

Say what you want about older homes but I cannot stand textured ceilings. Since we are not in Los Angeles anymore, I am not talking about the awful popcorn ceilings either but this kind of rough texture like cream cheese spread on a bagel. I get it: it hides imperfections. But it also absorbs depth and I find them to be dingy looking. So: we smoothed the ceilings! Which in the process discovered the the ceiling were not level (you seen see the blue chalk line across showing the difference) so we fixed that too.

8.13-10.jpg
F59A62EA-08AB-4ABE-81BB-3FD4D7CE6CDB.JPG
0258667B-810B-46B7-BC88-F4F694604874.jpg

Earlier this year when we removed the divider we discovered the ceiling was two different heights from the “two rooms.” So instead of demoing and starting over we were able to add a carefully cut piece of dry wall and then skim coated the rest. I can’t put into words how much I love it. It’s so nice to stand in the dining room and see that now these two rooms are finally consistent with each other!

Here is the living room from the listing on the house when we bought it:

house old.jpg

And NOW!

60E6CEF9-D9EC-4295-B2BE-1383F72086A2.JPG
C5223984-0186-402D-8494-04EF2754AF2E.JPG

More of the process…

68C04283-9884-45FE-A671-FB3CBB6C3F79.JPG
B56C84C2-D916-4A9E-A627-83C680052317.JPG

TRIM, BASEBOARDS, MOLDING, AND ALL THE PAINTING

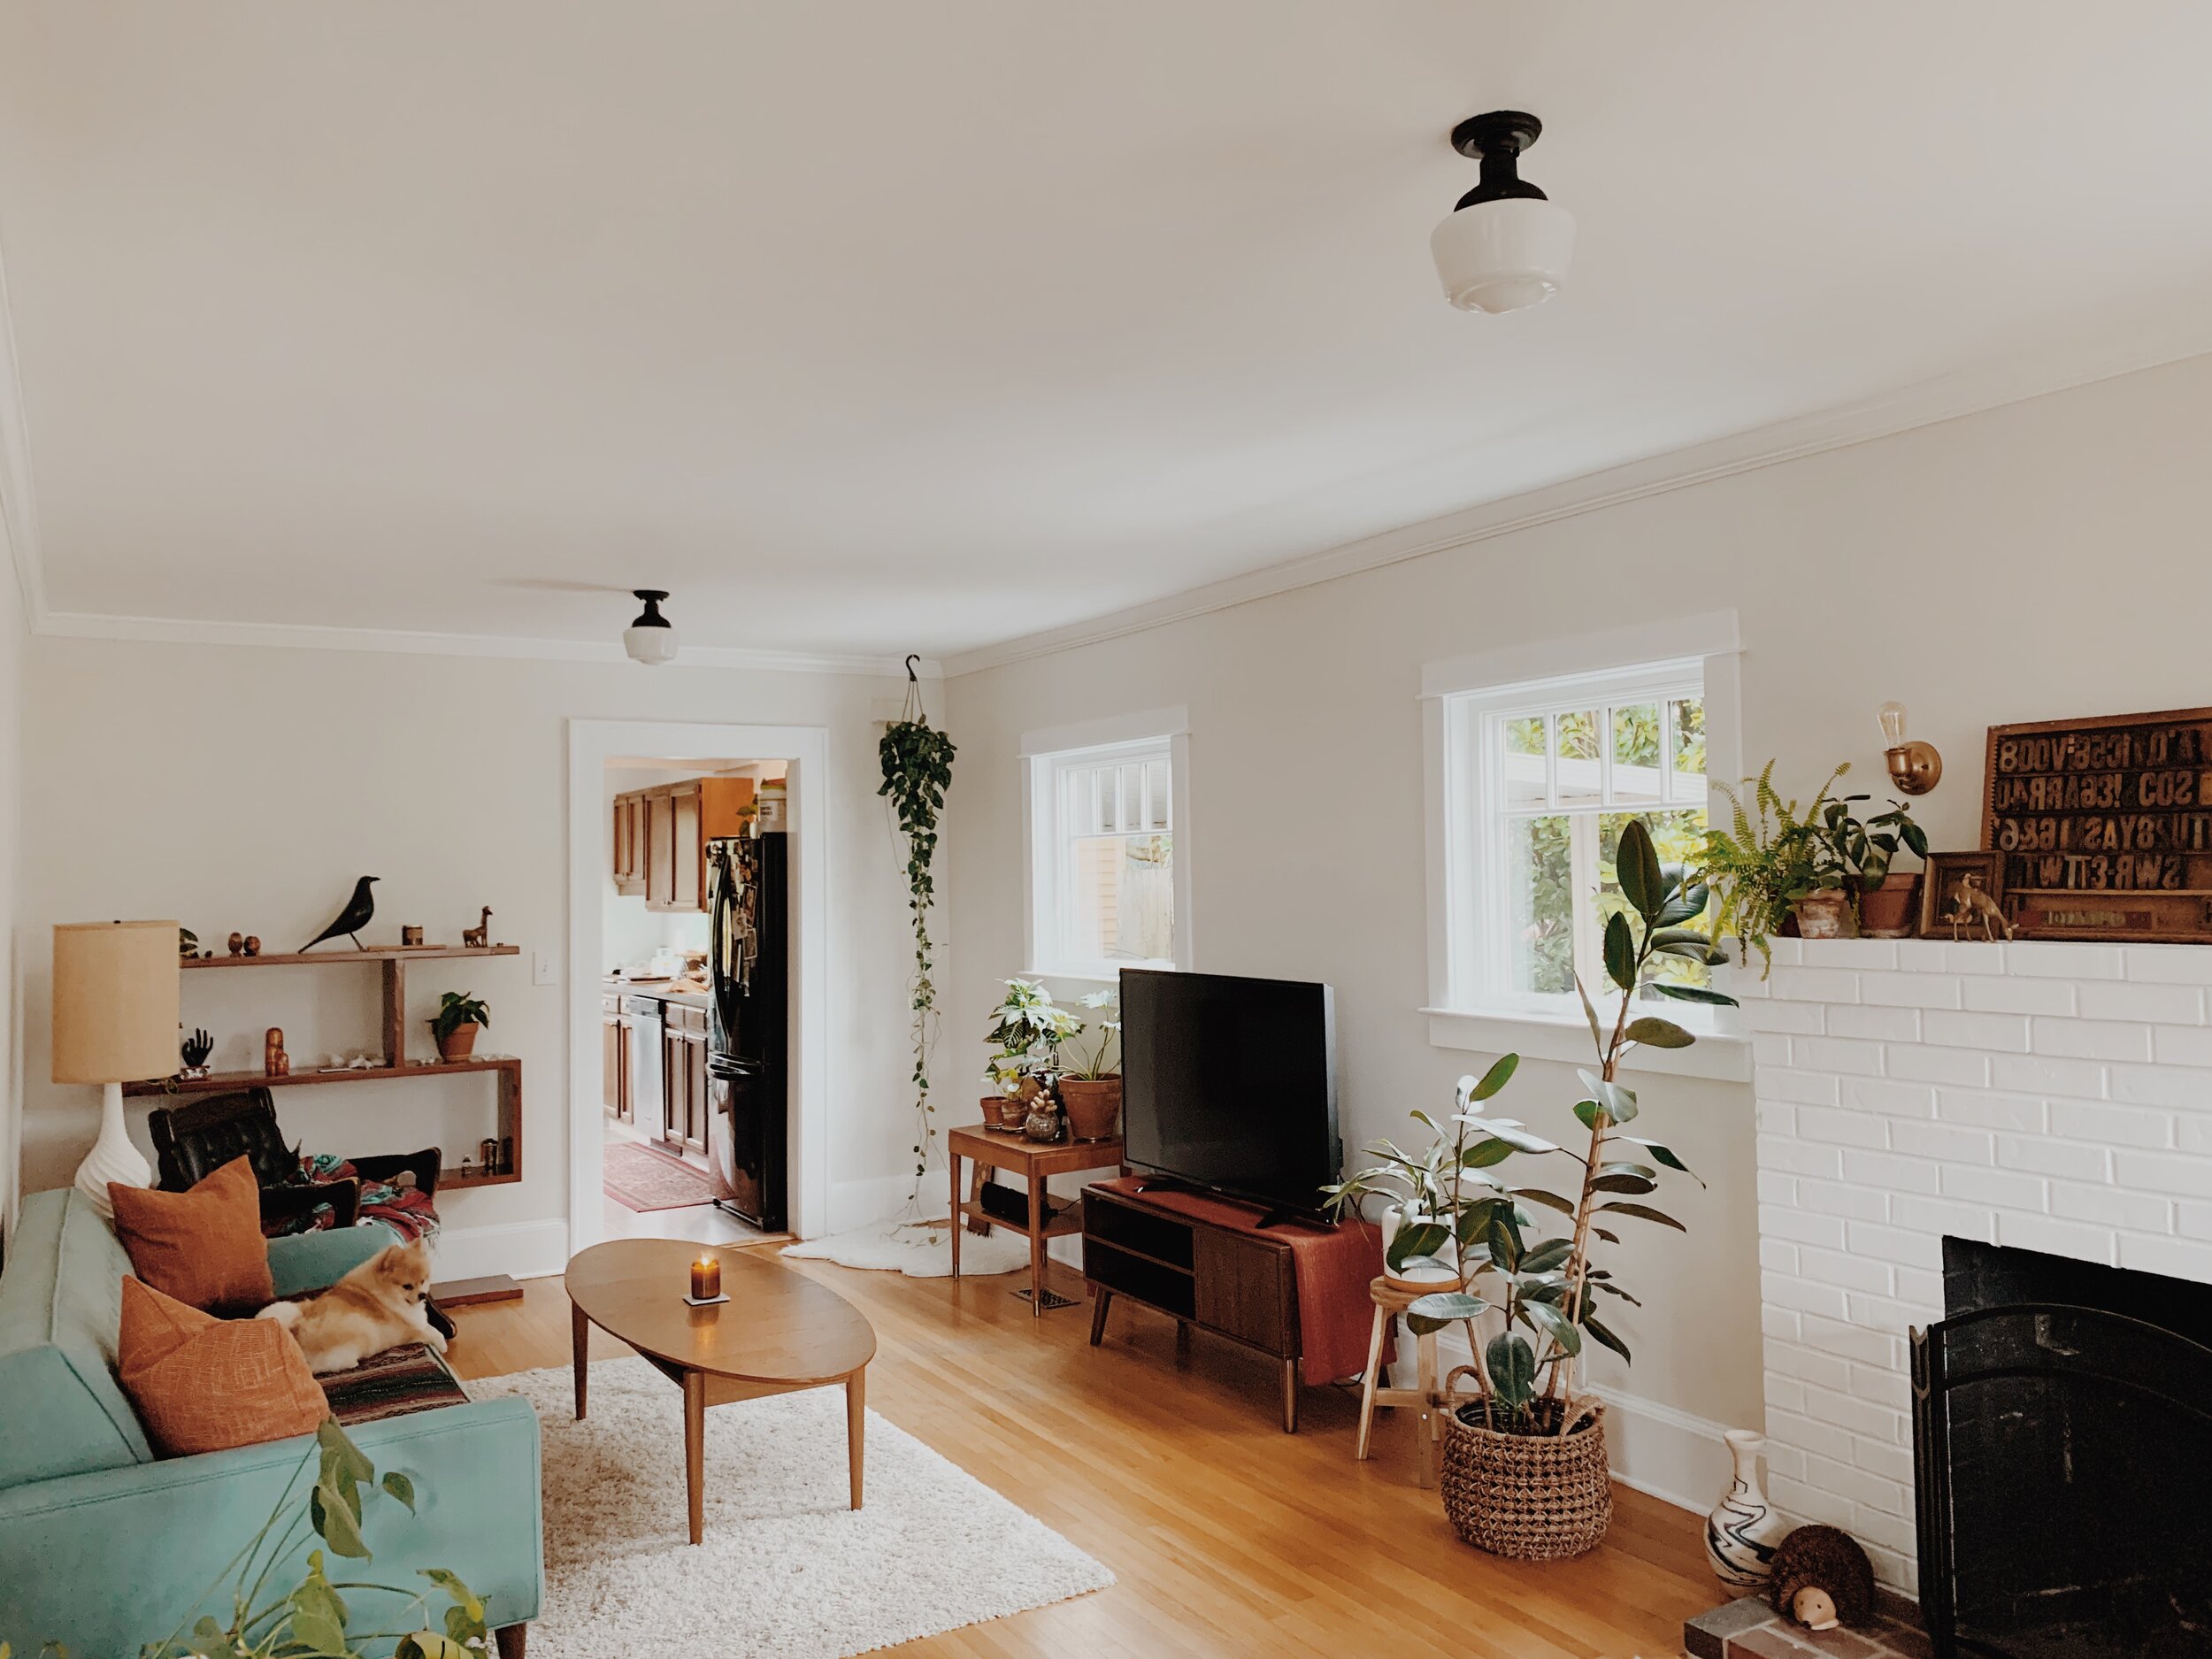
Ahhh and of course a room is not complete without proper trim! Each window now has the beautiful but simple craftsman style trim, 9” baseboards across the room and classic crown molding from McCoy Millwork. Besides all the dust from the new drywall, the painting was the most painstaking part of it all. It takes so long and there were so many steps with all the trim and different paints. We painted the room to match the dining room in Benjamin Moore Cloud Cover in Eggshell, the trim is pure white in satin, and the ceiling in a flat white. The room looks so classic, light, & airy considering it’s such a small space (25’ x 11’). We cannot thank our beautiful friend, Nikole, for taking so much time out of her life so constantly help us with painting and am forever grateful for her and her steady hand.

E86F6DA2-45D5-48BF-B172-57D42BB88653.JPG
945A7F6F-42CC-4E5C-848B-45B1E43A3054.JPG

We finally moved all our furniture back in just in time for the long MLK weekend and my birthday. We haven’t hung our window coverings back up yet but I am okay with that. I love being able to sit back on the sofa with some coffee (or wine) and admire all the natural light. P.F. Candle Co. was also so kind to send us some goods including their new scent, Sunbloom, which smell like a dream and brings back memories our hometown in California! It makes our space feel even more welcoming and warm - eps on these dreary winter days (Thank you!).

I was hoping with this renovation I would be able to find new sconces but I had no luck finding ones I loved with a rotary switch without costing a ton. We don’t use them that often so I didn’t want us to go through the hassle of re-wiring them to the switch either. So I spray painted them using the same color I used for the hoop log holder a few years ago and I think they turned out awesome. And it literally costed us nothing.

B545A94C-74A6-45E3-9195-564088ABE548.JPG
86BC2866-3B02-407E-87D2-6F96D954FE48.JPG
D0D1BE97-75F8-47DD-963C-20C0E0C03D17.JPG
C4518C10-B311-43EB-B9D2-2B9AF3D348A0.JPG
CFDD40E1-5086-4F92-93FA-D26B2FA3F937.jpg
85D4D377-F856-47ED-9A19-0256BF3BDBAE.jpg

We will likely be taking 2020 off from any major renovations to save for the main bathroom remodel as well as fresh the hallway and guest-room/office with matching ceilings and windows and maybe actually take an actual vacation! And maybe this year we will get a new sectional sofa, coffee table, and lights but for now this is great. I am finally feeling like this little house of ours is becoming exactly what we envisioned. This house has definitely taught us (and mostly me) patience and how to manage realistic expectations.


Follow

OUR HOME : UPDATES

 
7AE10A4F-427F-40AC-95D4-1A9814272D16.jpg

It’s been a while since I posted any updates on our beloved bungalow that we affectionally refer to as Dandihaus. This year has been interesting and filled with smaller DIY projects rather than anything larger scale due to an unfortunate, yet respectful, decision from our go-to contractor. So here’s what we have been working on!


LIVING ROOM UPDATE!
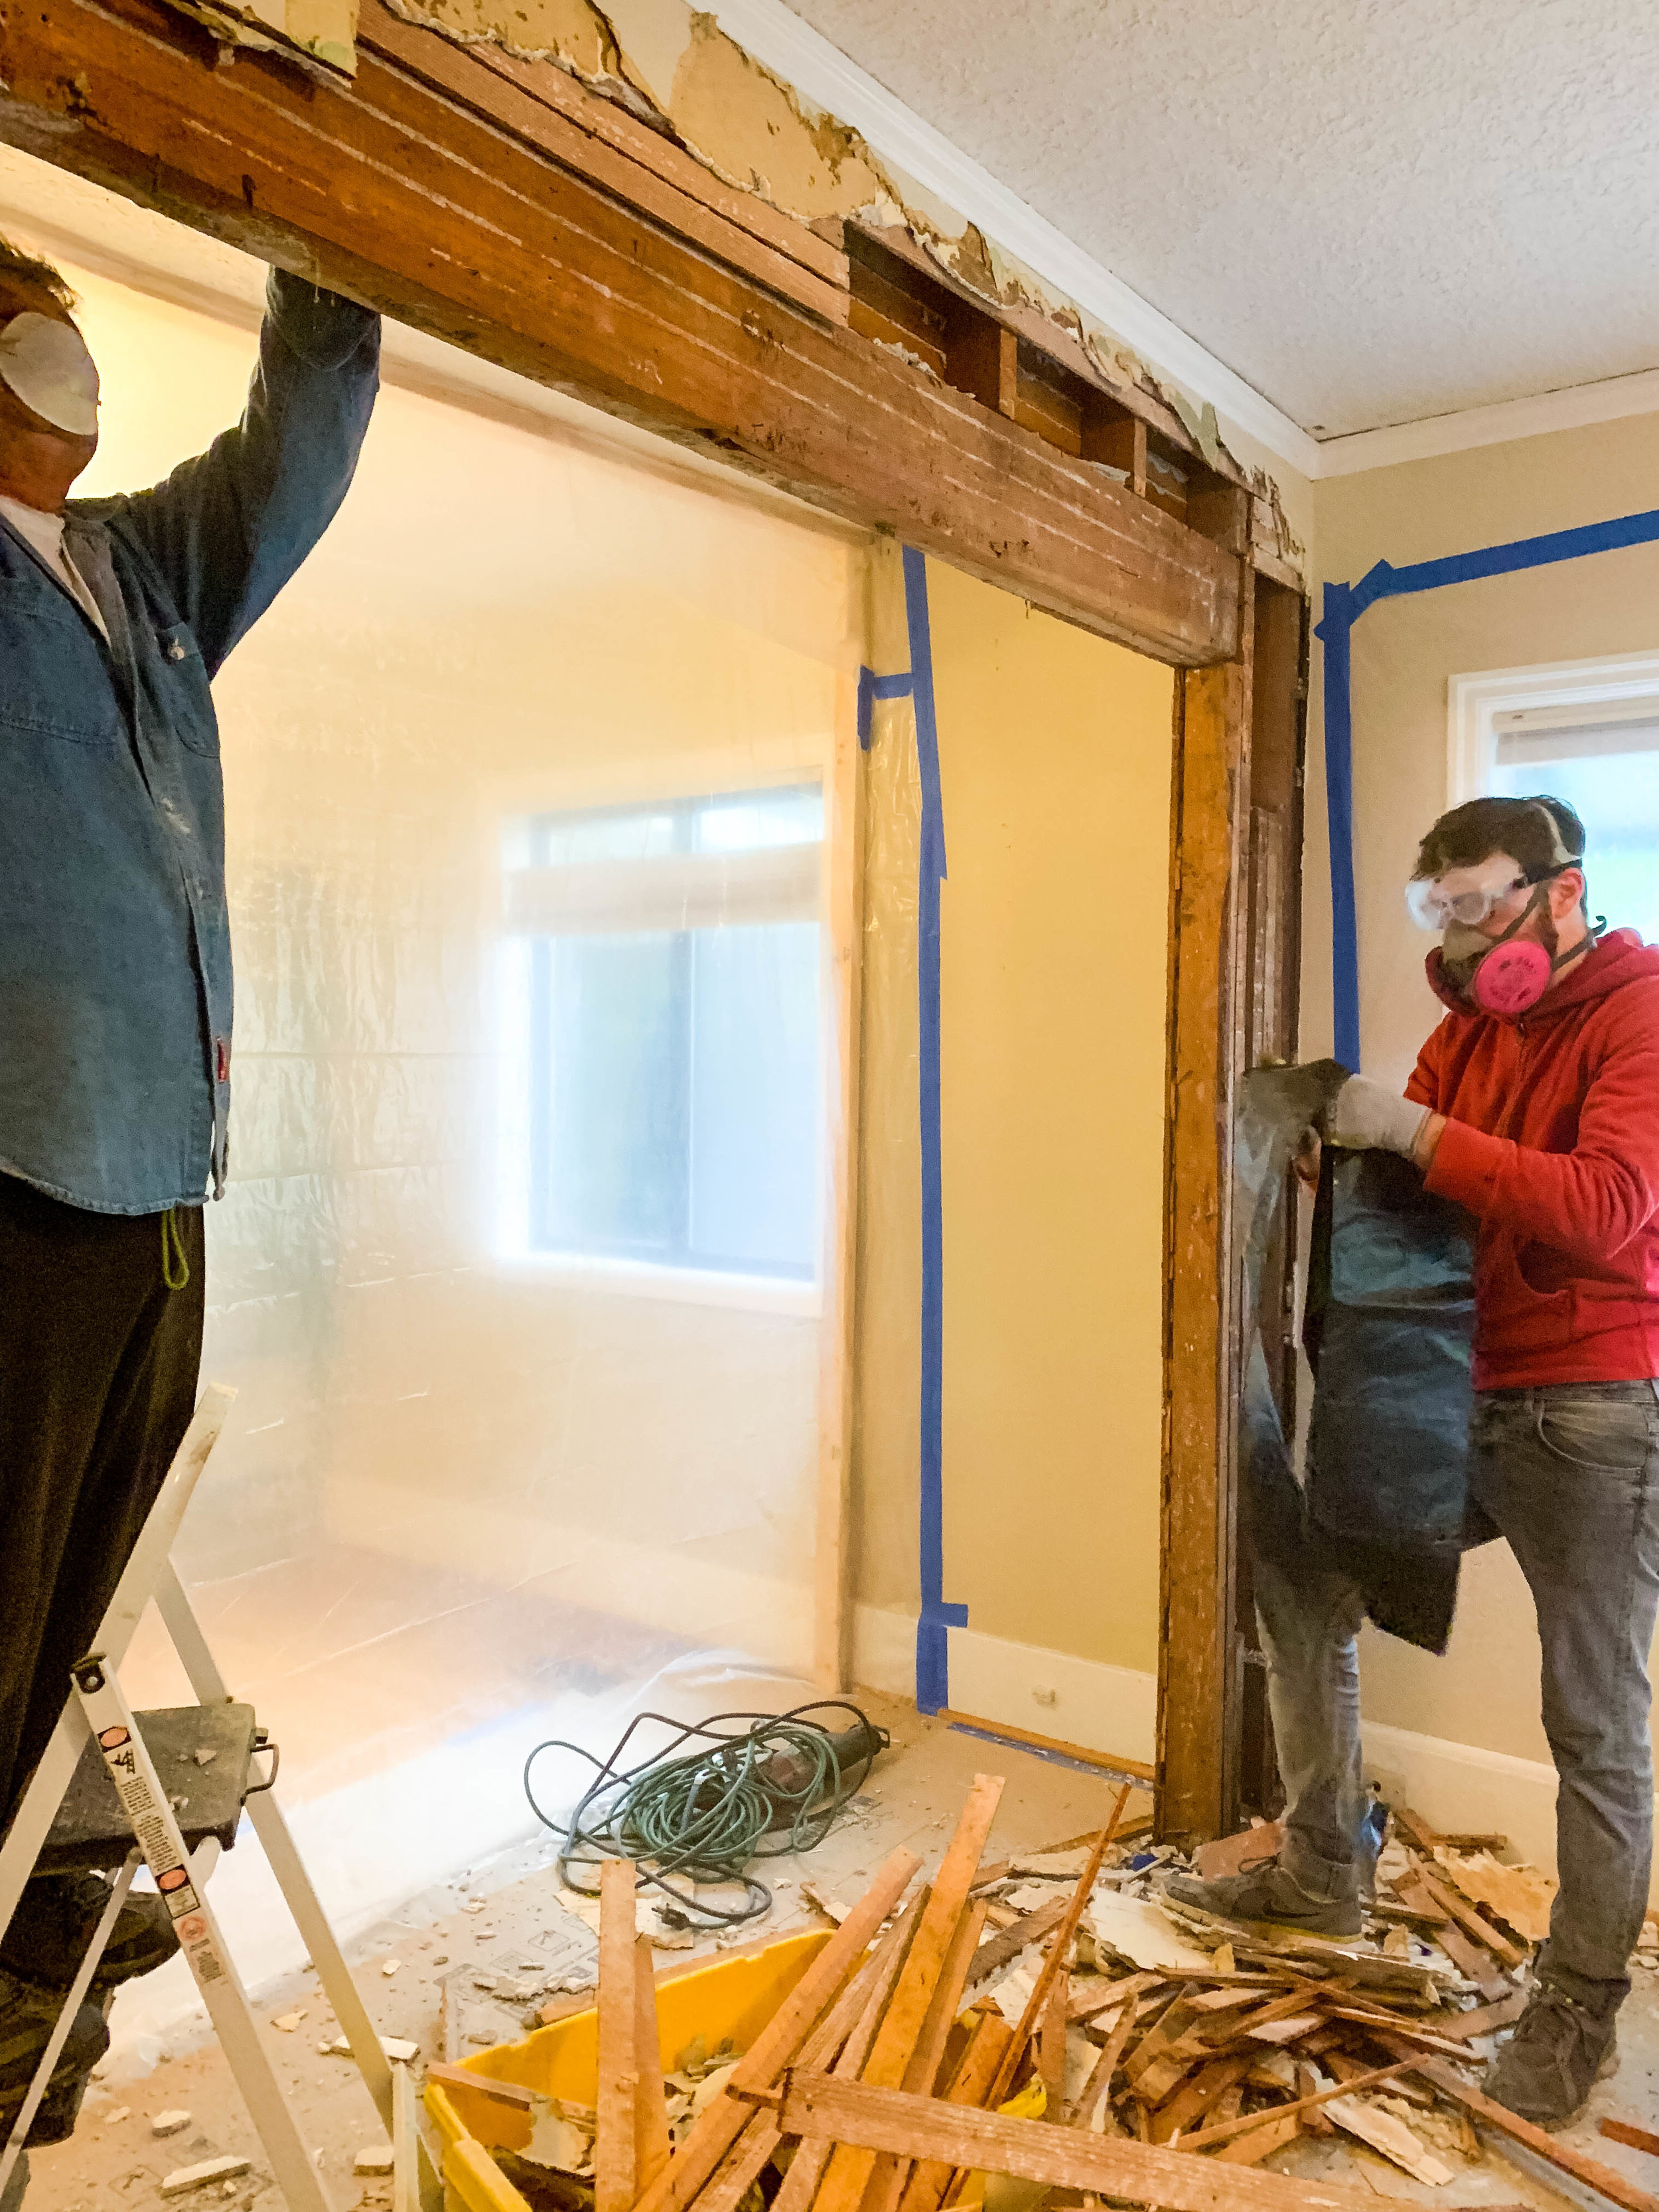
Once the dust settled from the stair renovation and the holiday season we decided to take down the awkward archway that divided main living area and making it flush with the walls and ceiling and closing the original doorway into the hallway to make one seamless wall.
Our living area has always been pretty snug but once the family visited for New Years we realized how constrained we were were by this arch way ifor furniture placement wanted to create a more open space. Luckily, we were able to schedule this project when my father-in-law was still in town so he and my husband got straight to work on demoing. Once complete, it only took our contractor less than two weeks to patch up the walls and ceiling and make new baseboards. Then with a few coats of paint to cover up MORE beige, the living area improved a million times. We were a little worried that closing the old hallway entrance would make it dark and an awkward space in the back but it actually was perfect and created a lot of privacy for the bathroom and guest room.

In the near future we are looking to re-size the one window near the kitchen and replace all windows in this room to match the style of the new one in the staircase, smooth the ceilings, replace the trim, baseboards, and crown moulding. Stay tuned.

8.13-2.jpg
8.13.jpg
8.13-4.jpg
8.13-5.jpg
8.13-10.jpg
8.13-9.jpg

KITCHEN UPDATE!
The kitchen has been such a debate. The original plan was to give it a refresh to hold us over until we could gut and remodel. We started by painting the walls because I just couldn’t take the beige paint anymore. I admit, I did this in kind of a rush without really thinking or wanting to put too much thought in it and just ended up painting it white. Like really white. Like the white in the can sans any pigment. For some reason, I just didn’t think of it until I was half way through and I was already using a paint-and-primer in one and was not about to do it again.
Good news is: WOW did it make an improvement in light. This kitchen actually feels alive now.
Bad news: it is REALLY white.

268E6B61-429F-487F-8ACA-D70D72CE3C55.jpg
99A55E83-40F3-4FC1-ADBA-08CF67CB55FD.jpg
A2BFF2EB-BFD3-4C7B-AA4F-FD941EA11602.jpg
IMG_1536.jpg
IMG_1525.jpg
E0DCA527-A8C6-45BA-8834-BF367D2C86FB.jpg
C0032B8F-77FB-4C53-B69E-E1068A49DDC2.jpg
50C6196B-F2B0-4E09-A0C9-50DD4A00F980.jpg

Next, we were going strip and paint the cabinets which my husband was really against. It was going to be a lot of work and I wasn’t sure how it would turn out. The white walls were great but it did make the ugly ass counter tops and crappy floors more noticeable. Where do you even go from here? We didn’t want to paint the cabinets white now too and we could not find a color that would compliment anything in this kitchen. Not even black would do. And you know what, we kind of didn’t hate the contrast of the wood against the white walls. But man, were they beat up. My dad was getting ready to come out to visit to help us with the kitchen and anything else so, thankfully he came up with a simple and easy solution: Old English. That shit really brought out the warm wood color and hid almost all the wear and tear from decades of abuse.
And then to add insult to injury: these cabinets seemed to have never had any hardware! I didn’t want to go out of my way and spend agonizing hours sifting through the billions of hardware options so I found some decent knobs and pulls on Amazon that I would not feel terrible about getting rid of in a few years with the remodel. We needed a total of about 30ish pieces and couldn’t believe I found these for a grand total of about $50! I think they are great for what they are.

_MG_9317.jpg

We also finally changed out the terrible lighting! My husband switched out all of the crappy bulbs in the canned lights with new LEDs which are awesome. And we finally took down those two awful light fixtures (can you believe I couldn’t sell these babies?)! I ended up moving the pendent light from the guest room and we hung it above the stove and then added an awesome chandelier in the bay window / one day breakfast nook from Schoolhouse Electric.

B4E2B700-2C23-4F52-9E1E-555729DBA1E9.jpg

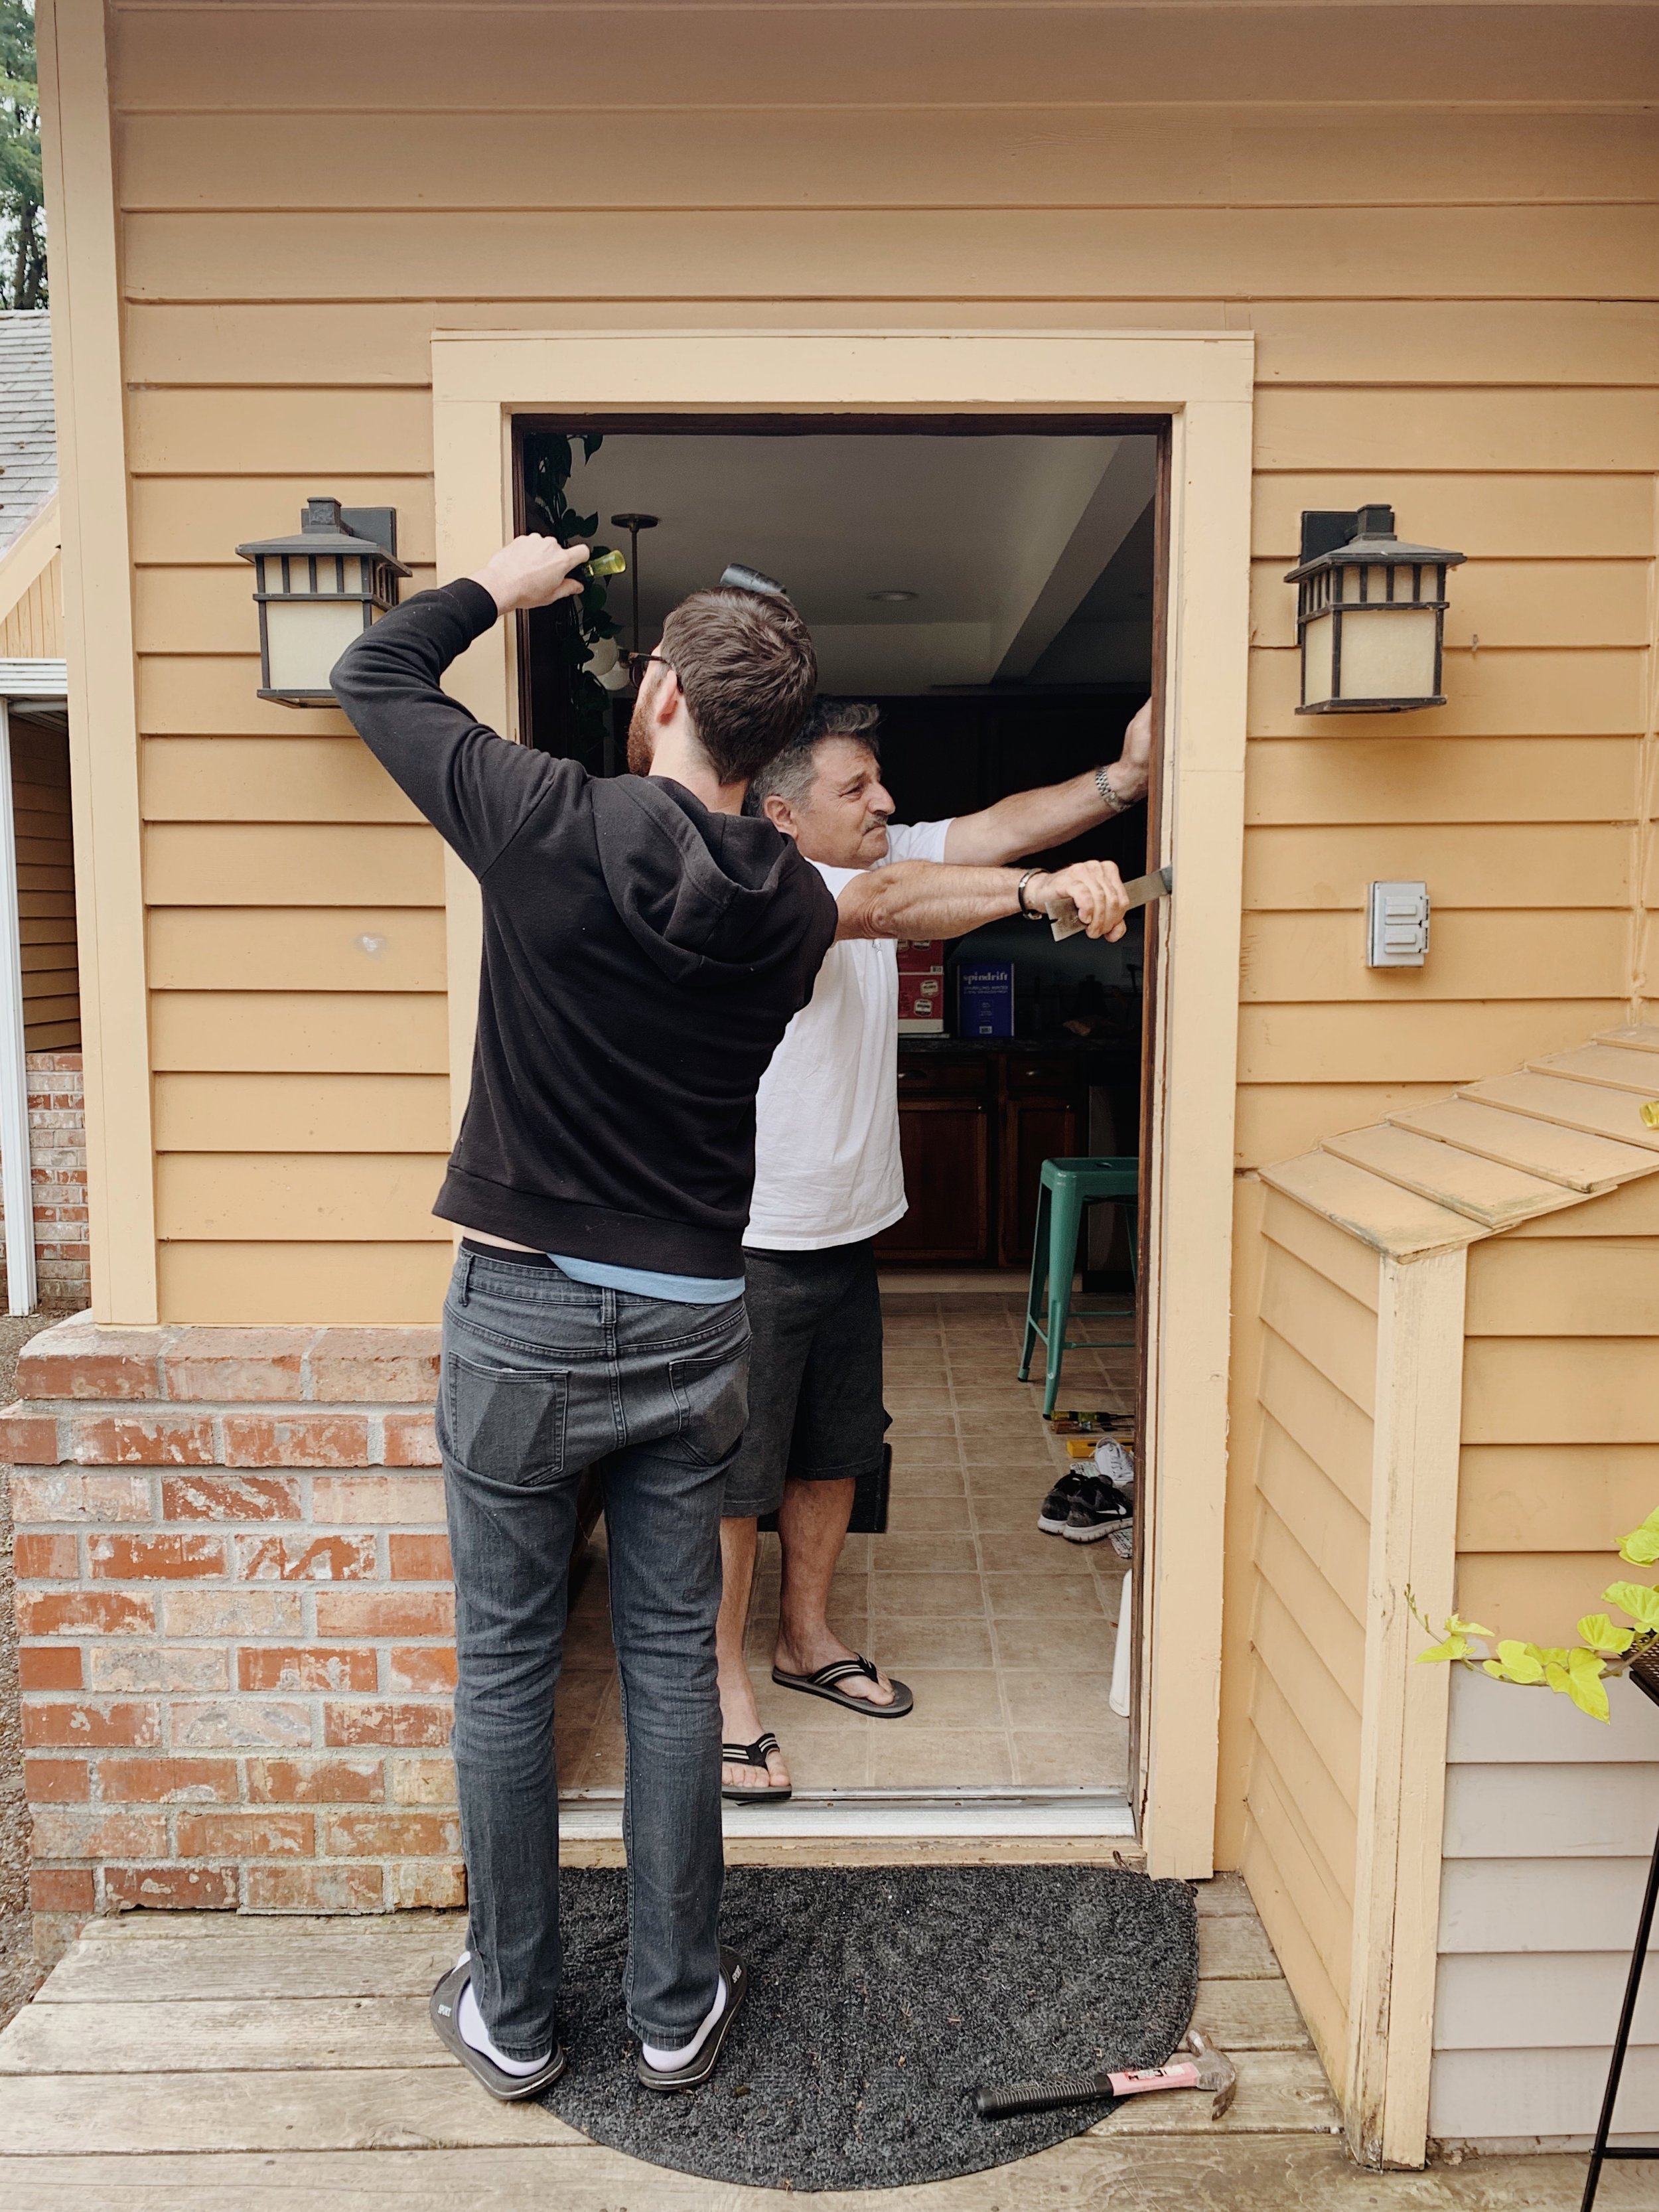
Lastly and probably the best: WE INSTALLED A NEW BACK DOOR! I couldn’t stand the door that came with the house! It was warped, weathered, didn’t seal completely and was dizzying. Now, this was something that would be a permanent fix so we took this decision more seriously. Thanks to some light internet searching I was able to locate a place called Building Material Resource that sells high end doors that have the slightest manufacturing defects so the doors are literally half the full retail price. And I found exactly what we were looking for!
We picked out a 1/4 lite with a single panel solid fir door by Simpson Door Company. This door was everything that I wanted, it met our budget, and it went perfect for the vision of our future kitchen. It is literally my dream door. Who knew a door could bring me this much happiness?
To save on installation cost, we flew my father-in-law out to help us with putting it in. And it was definitely worth the wait. The door is so beautiful and it lets even more light in! We also went with a keypad lock for it and it has been a great decision.
I totally recommend buying one if you are considering it.

47F47E83-DB1D-4F54-98D3-D5D74D646A90.jpg
IMG_7812.jpg

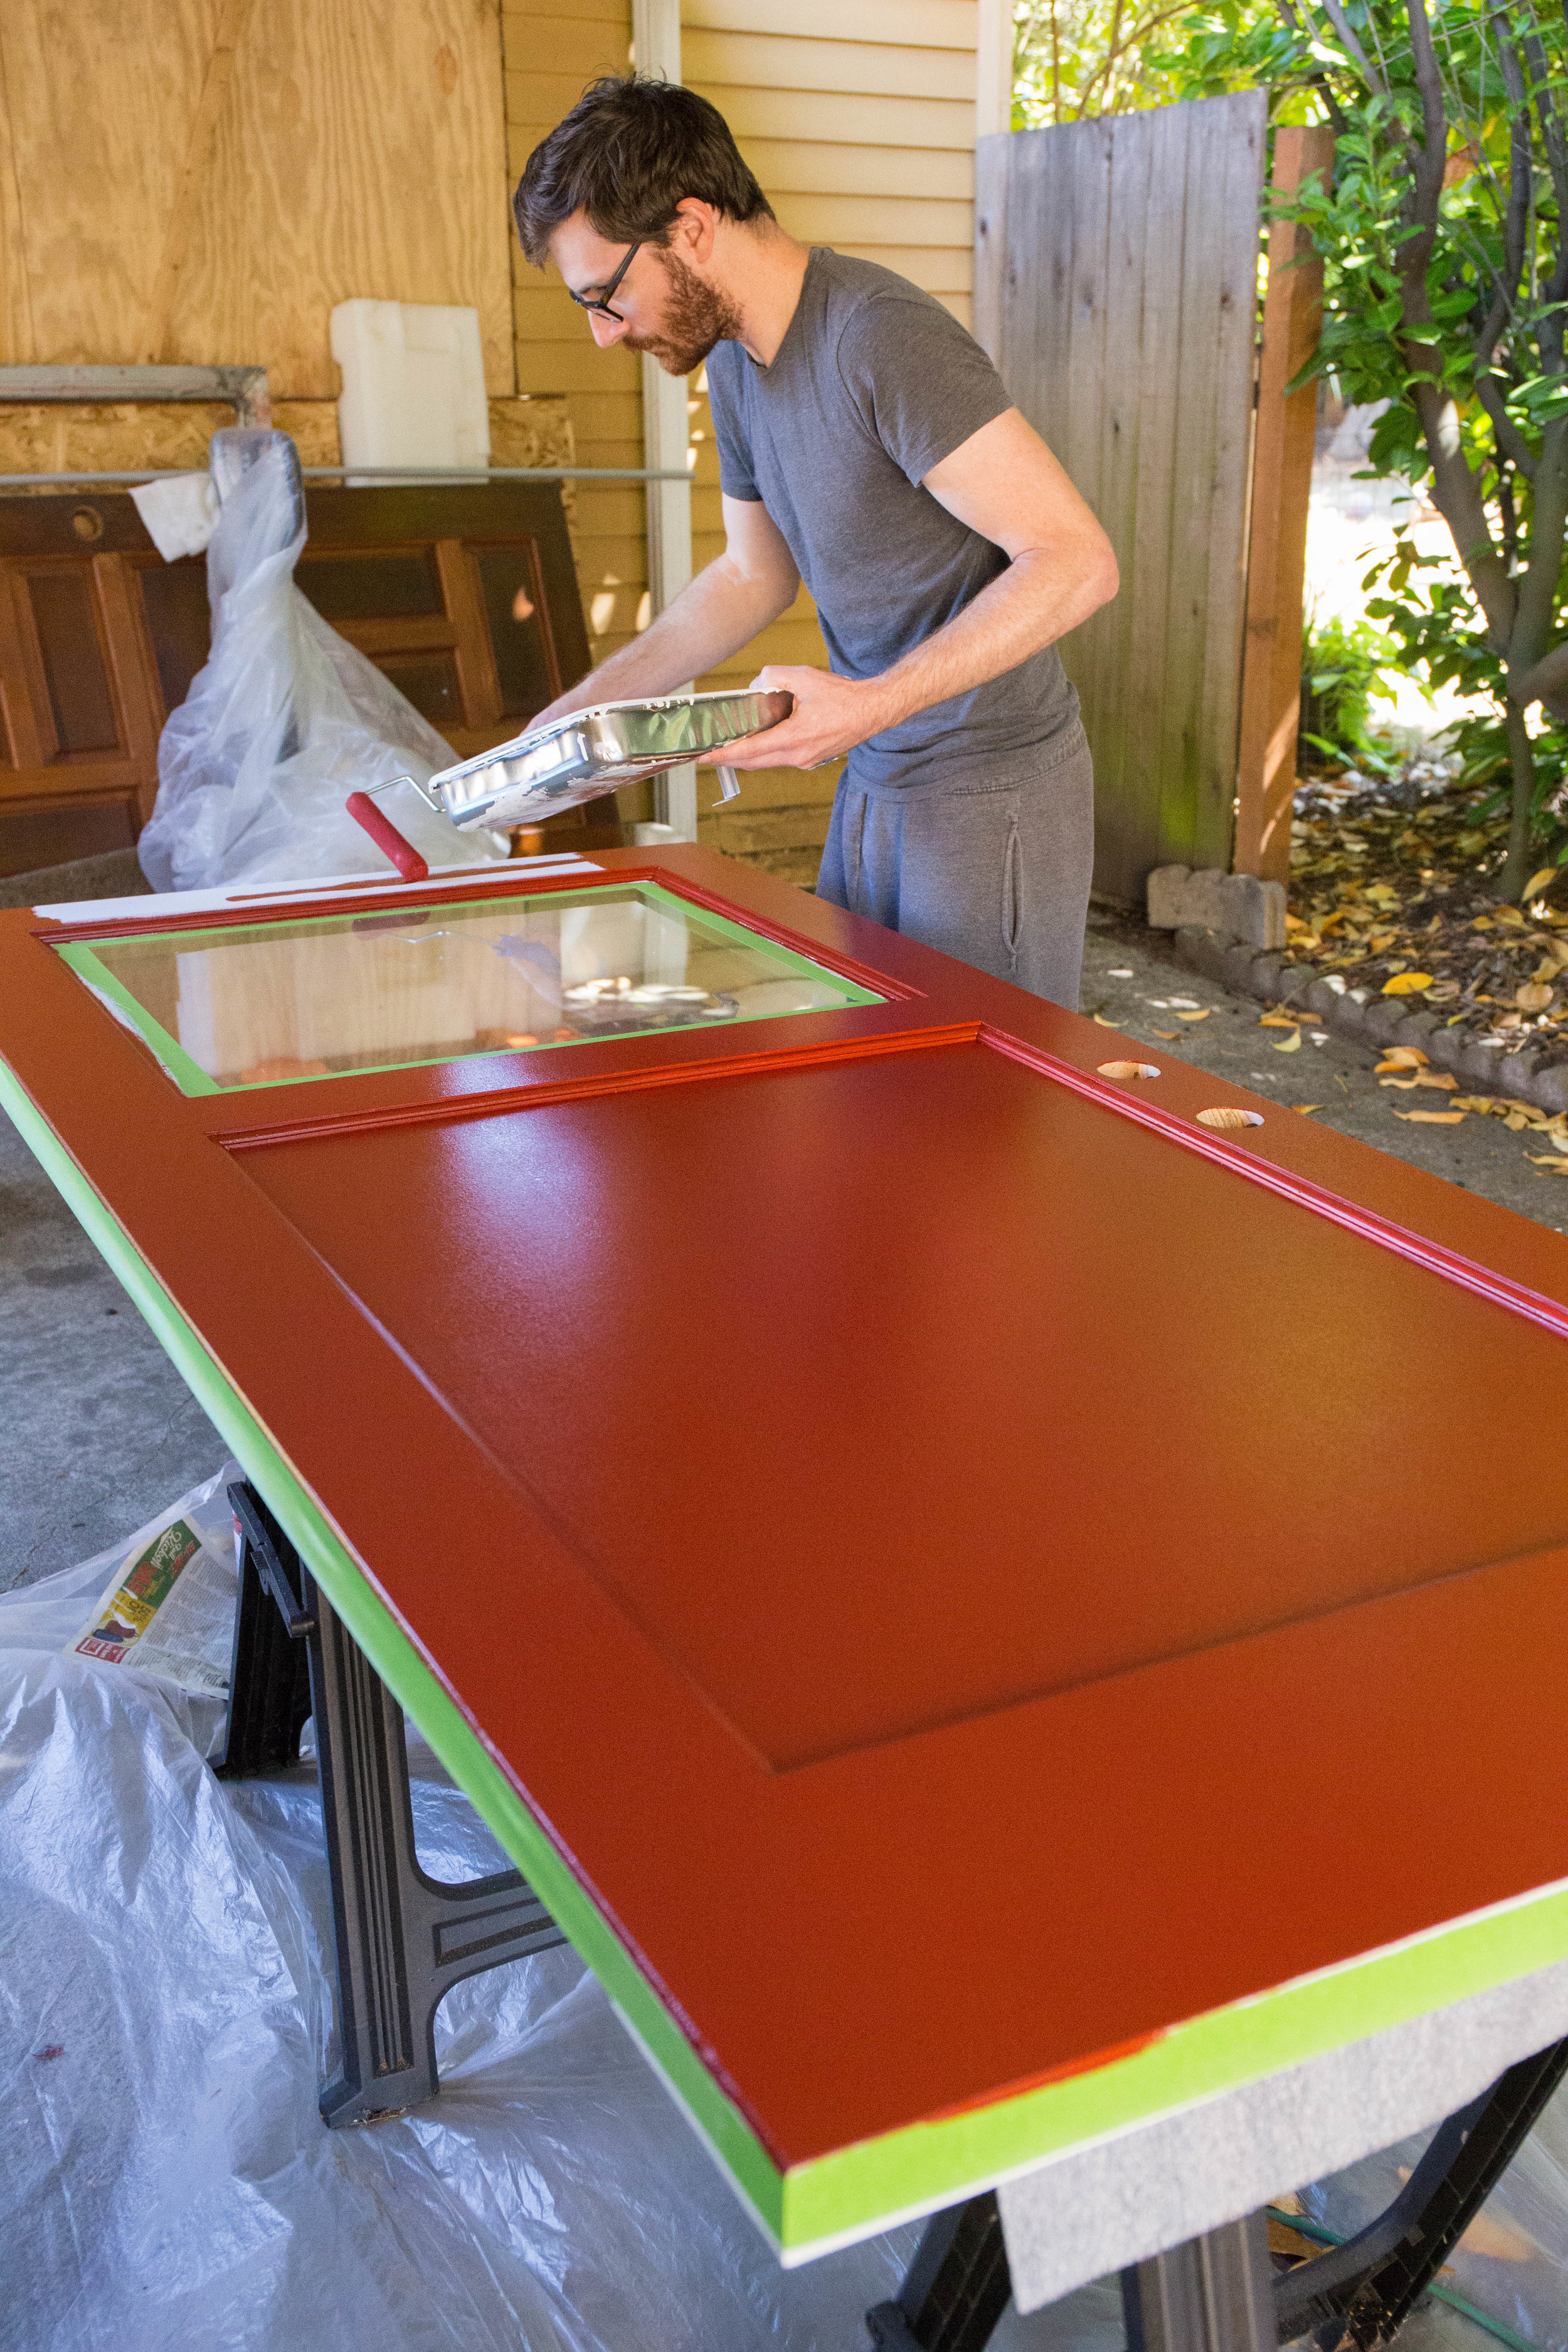
When it came time to finish it we debated to either paint or stain it. We originally went with stain. But to make a long story short - it didn’t work out. So we stripped it and painted it. We went with Behr’s Ultra Pure White on the inside and Marquee Red Pepper on the exterior (to go with our future exterior color scheme) in semi-gloss. I never thought I wold have a red door but here we are!

IMG_0353.jpg
IMG_0357.jpg
_MG_9287.jpg
_MG_9330.jpg
IMG_0528.jpg
_MG_9337.jpg

BATHROOM UPDATE!
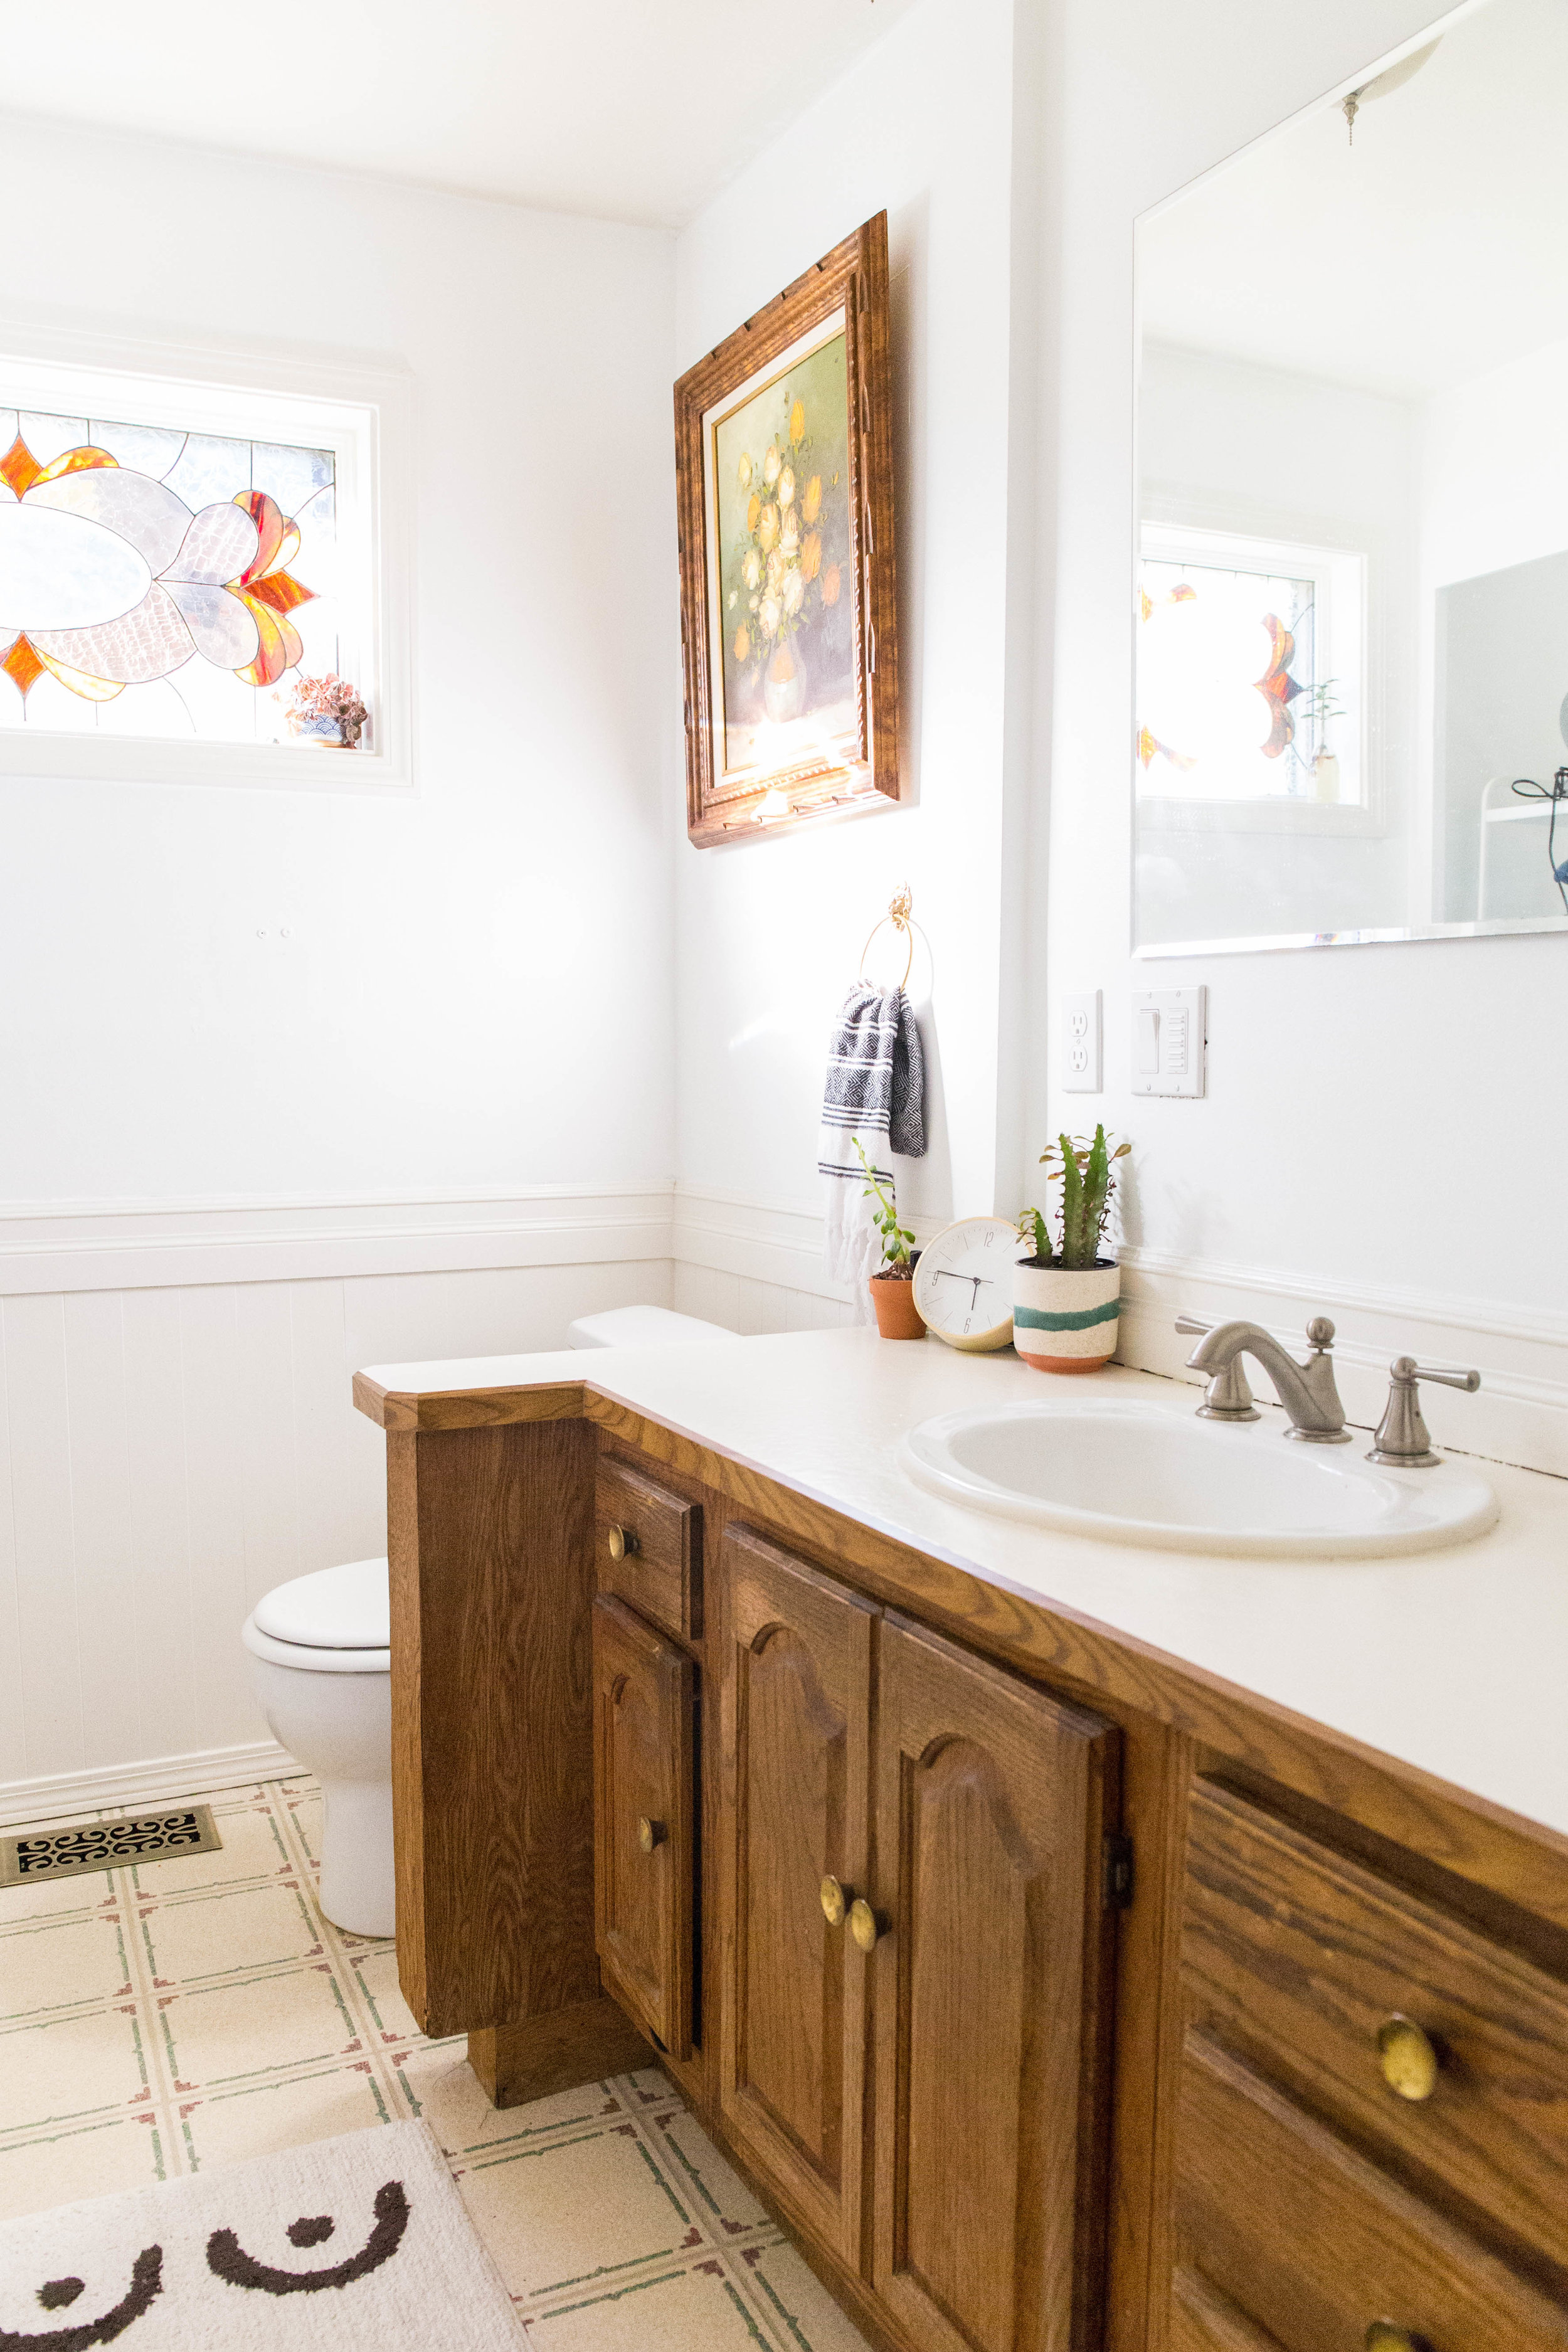
Another hot topic has been the bathroom. What to do with the this bathroom? Almost two years later and all we had done is put in a new toilet (which was huge). I couldn’t deal with the darkness from the turquoise any longer and had to get in there and paint it. I didn’t go for any specific color other than just white for now - I could change later. After what felt like a ton of work - once again the room was instantly transformed. It felt so much more like a clean and bright bathroom now rather than some dated room. I didn’t do the ceilings tho because I hadn’t picked out new lights and honestly the entire ceiling needs to be re-mudded and I didn’t want to deal with it at the time.

CD84C107-10D0-4EC8-8354-C7E0B1046B94.jpg
IMG_7305.jpg
_MG_9325.jpg
A8AE6618-4B6E-4C6A-9F49-A9B52FCB6F73.jpg

Since this was more of a refresh rather than remodel, I wanted to spruce up the vanity, too since ripping it out would’ve created a domino effect. I did some research and bought Rust-o-leum’s countertop paint. This stuff is cool but know what you are getting yourself into. Not only can you “not really” choose your own color, this shit is toxic and takes foorrrrevvvver to dry. But it did make the counters look better. From here I was going to paint the body of the vanity and put in peel-n-stick floor tiles (I found super cute ones from FloorPop!) over the existing linoleum but then once again, changed my mind due to to seeing how much work it was going to be and maybe if I leave it as is it will push me to do the full remodel sooner. But at least we have white walls now right?
I am still in the process of picking out a new mirror and hardware for the towels and such but I did find this awesome lion head ring from my friends at Hippo Hardware in Portland. This will do for now.

38DDB809-D86D-4305-8EA0-198E3A93E5E1.jpg

WE GREW OUR OWN VEGETABLES! AND ATE THEM!
The garden! I have been loving it though I don’t really know what I am doing. Back in the early Spring my husband built me this awesome raised bed out of left over wood we had. I love it. I began starting seeds inside in the winter for this which included super sweet 100 tomatoes, spaghetti squash (I used seeds from a squash we bought and ate from TJ’s), lemon cucumbers, celery, & jalapenos and bought starters for strawberries, spinach, beets, and broccoli. Not everything turned out so good but I definitely learned what to not try to grow again and what not to plant next to each other. It has been super rewarding to grow your own edible food tho. Can’t wait to try new plants next year!

48AAEFA7-F509-4390-96AF-3171B20B24DD.JPG
5CEC0784-8923-41BB-BA0E-6DCEEB41C313.JPG
IMG_5471.JPEG
D4EFF3D5-BAC1-46BF-9EB4-BB06C97C8149.JPG
B16D5B31-047A-4C18-88D1-B879420076F6.JPG

OH. AND THE GRASS DIED… AGAIN.

IMG_9946.JPEG

What a surprise. We don’t know how to care for grass. It’s worse than last year.
Come this fall we are planning on trying to re-seed this barren yard. Also, stay tuned.

Thanks for reading this far! Owning this home and working on it slowly has been such a ride.
More updates to come soon (I hope).
Love ya!

Follow