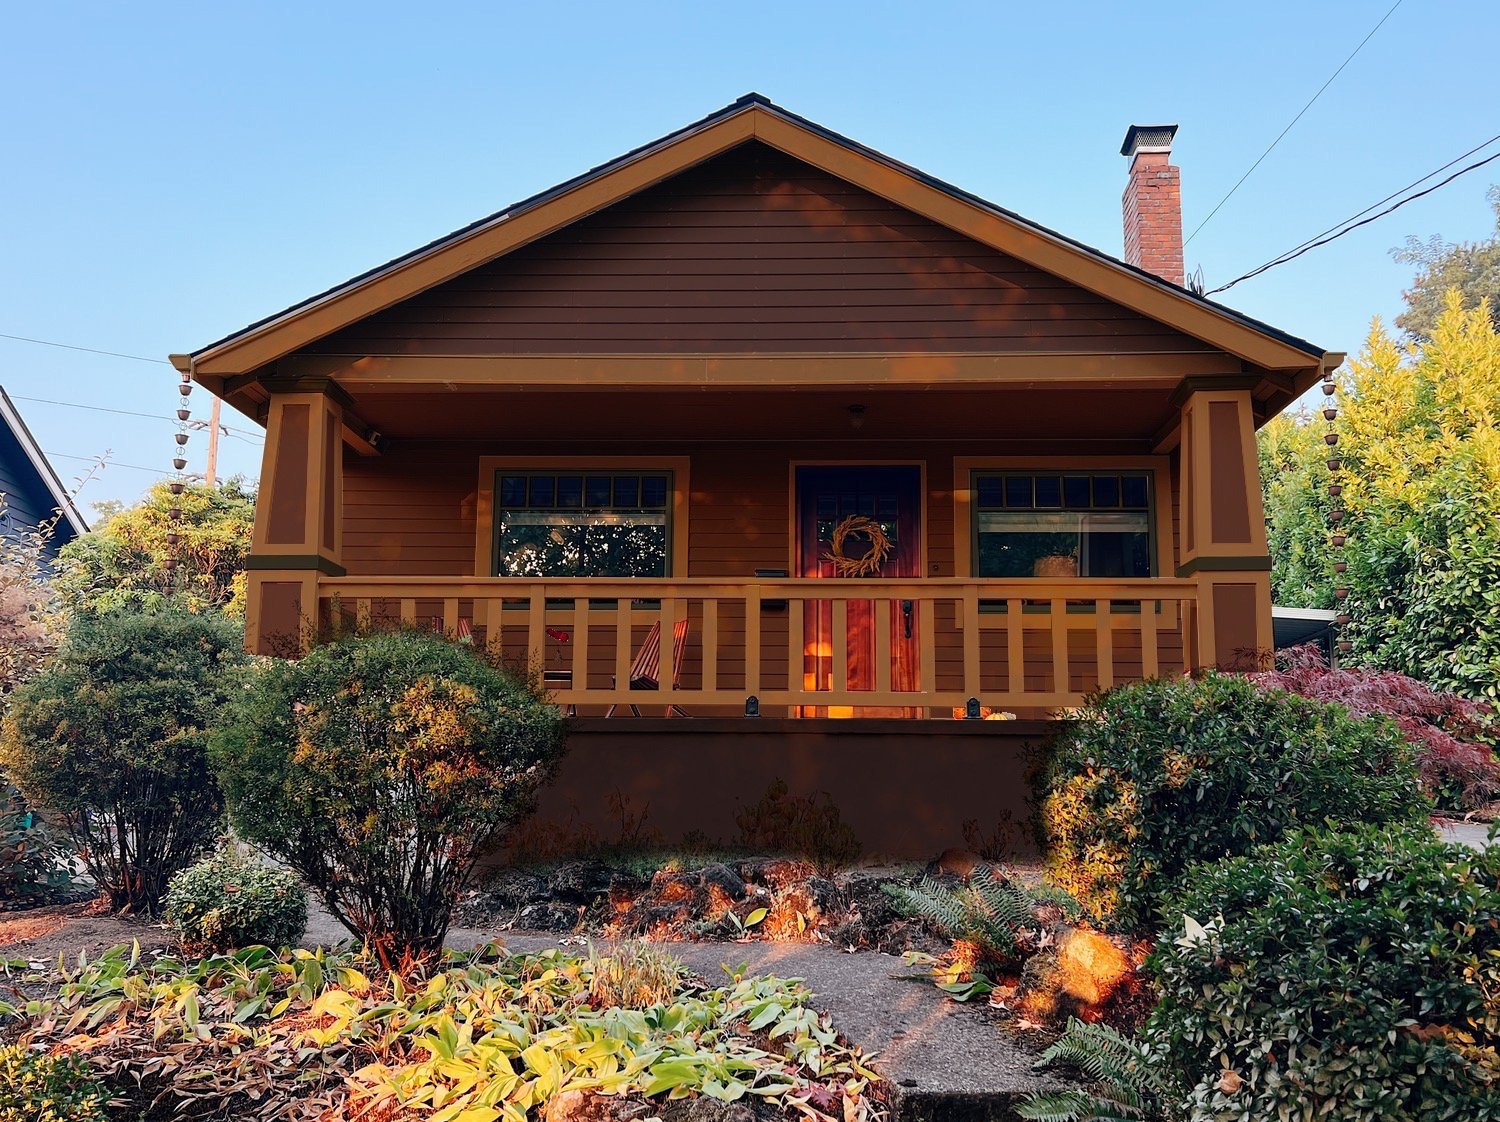
OUR EXTERIOR: THE PAINT PLAN

Paint Option #1

Getting close to the exterior home stretch: SIDING & PAINT!

We have been patiently waiting for this and now summer can’t come soon enough to get started.
Danny and I have been going back and forth about paint colors for yeeeears. I originally wanted to do green but then both houses to either side are now a navy blue… along with like 3 other houses on our block, so we figured it would blend in too much and decided we wanted to be different, bold, but traditional.

Over a year ago while we were on Whidbey Island we walked by this book store and we really liked their paint scheme, sans the teal trim. After doing more walking and biking around Portland we can across other homes that were similar and we were sold. But… finding the correct tones that worked for both of us proved a little more challenging.

At first we thought we could to color combination on our own especially with Danny’s history in color theory but this color combo had proved to much more challenging than we thought. Danny would mix colors on his own and we would paint samples and still nothing “WOWed” me. It came down to the question: Do you want people say to “the purple house” or “the red house”? ANSWER: RED.


So finally when schedules aligned, we headed over to Powell Paint in SE Portland to meet with their Color Coordinator, Mary. After describing our vision she very quickly, and VERY excitingly, started pulling swatches. And let me tell you: she was spot on. She helped us narrow down the exact historic shades we both wanted. Red-brown but rich with a gold trim and a green-almost-black highlight. In addition to the giant paper swatches she gave us, we also got decent size samples to paint large portions to confirm this is what we want. But it still being winter in Portland, we have not been able to just yet.

SO once again, here comes Danny with his skills and photoshopped four different variations of paint schemes. The very first option at the top of this post seems to be our favorite with the others following in order. We will also be painting the chimney likely in Waller Green. Excited to test out these colors in real life in a few weeks!

Paint Option #2

Paint Option #3

Paint Option #4

But before the paint can happen: we are also re-siding the entire studio as well replacing some boards on the house. The studio will be completely re-done in Hardy Plank which will hopefully last for as long as we are living here. This will also help with the paint because there will be almost zero prep involved. Other items we are considering adding is maybe a Dentil Shelf on both the front door and across the horizontal beam above the porch and a cupola on top of the studio where we will install our Pomeranian weathervane. Silly, I know but it’s Portland and it’s normal to be weird. Stay tuned!


Follow

RENOVATION NO. 5 : UPDATES

 
IMG_1605.jpg

Remember how I said renovations take longer than you think? Yep, I am still correct. What we thought was going to be a quick project has really turned into something larger. It took the contractor almost three weeks alone to get in and out and we under estimated the work for us after on top work working full time. So here we are: WEEK 5!


That being said we have made huge progress! All EIGHT windows have been replaced, all new trim is installed, the new closet is huge, and our future breakfast nook area is looking cute as button. TWO WEEKS ago we began painting and WOWOWOW it’s a lot. We considered for a minute in hiring someone but with covid and us not wanting any additional outside people in our home and longer-lead times we decided to once again: to paint ourselves.

23F60E98-D070-4062-9C0E-07C6064119A7.JPG

I was hoping to kick off the painting the day after the contractor packed up and left since it was going to be a long weekend but we didn’t have everything we needed as we thought. Our fault for not noticing earlier (and I just wouldn’t know) but they did not PVA the drywall. Easy trip to Home Depot. BUT then it snowed..a lot (See Portland Snowpocalyse) and we couldn’t get our car out for FOUR days. So we had a slight delay. It happens.

EACBFAD5-27B0-4179-8677-C57D2D126A6F.JPG
IMG_1204.jpg

Once we got the painting started it hasn’t stopped. We decided to focus on the office and hallway first. After painting the living room last year I thought the office would be a breeze! I painted it before right after we bought the house and I did it in two days. But with all the new trim and details: it was taken forever. TEN DAYS TO BE EXACT. My lovely friend, Nikole, was kind enough to come over to help again to get me started and I am forever grateful. Then I got the call that our new sofa is ready for delivery so I really kicked things into high gear, took a deep breath, found my inner zen, slowed down, and took on the rest of the painting all by myself. I never thought I could do it but I can do anything, right? I conquered edging and painting the crown, baseboards, and window trim without using ANY TAPE! I rule! I even took it the next level and used a teeny tiny brush to hit the details on the baseboards and moulding. We are even giving the very awkward closet a bit of a facelift with some small changes and fresh paint… it needed it.

IMG_1535.jpg
IMG_1538.jpg

Though it’s been A LOT of work.. the results have been worth every back-breaking minute. We cannot be more pleased with what the office is becoming. And.. sofa is delivered tomorrow! I can’t wait to move my workspace back in there! It may be the best room in the house…for now!

Snapseed (5).jpg

Due to the main and closet doors being warped, we also made the decision to get new doors to match the existing style with using our original hardware and mortise. Yay… more painting!! But turns out.. painting doors is kind of my favorite. I love it. I used a super smooth roller and it was breeze! Pro tip: go easy on the paint to prevent dripping underneath on the other side. Always roll over the backside edge when the roller is in need of paint to smooth out! Don’t forget!

7E2091F3-4B8C-4036-8C30-CCA540B45284.JPG

As I said, we used the original hardware. My beloved vintage glass knobs! I would never let you go!! The hardware… was a mess. So I did some interneting and found that I could easily remove the paint by soaking them. So, we went down to the Goodwill, picked up a $3 (it really was $3) crockpot, because lead…, put those cuties in there with some water, and let it soak for 8 hours. Before removing, I recommend wearing a K95 and gloves because lead… I dumped the water and carefully removed the pieces and used a flathead screw driver and the paint literally just fell off! Viola!! AND turns out our hardware are original Stanley Work Sweetheart brass hinges! How dare anyone ever painting over these! Shame on you, previous owners! I plan on shining these up this weekend with a little baking soda and steel wool!

7D111829-078C-46D2-BF70-6ECD64C30821.JPG
IMG_1648.jpg


OTHER UPDATES!

IMG_0548.jpg

Our cutie breakfast nook is coming along! Though neglected lately.. the change is so drastic. And to have opening windows… I can’t wait for summer! Once we get to working on this spot I’ll post more. But for now, it’s cozy as is and great place to store all our paint supplies.

IMG_9994.jpg
IMG_1654.jpg

Another neglected area of the home: The Hall. Also looking super fresh. Though we heard our contractor ask her assistant “Why would anyone put crown moulding in a hallway?” I am 100% happy with our decision. The rest of the house has it (or will) and now it looks finished! We also removed the ugly, weird vent between the hall and our bedroom which makes it look clean and now it’s more quiet upstairs. Double win!

IMG_0966.jpg

Lastly, the upstairs windows! We replaced those, too, but it’s small potatoes to everything else. We went with Marvin’s double-hung rather than casements because I worried about birds flying into them and the hot summer nights we use a fan. But sadly the one in the landing doesn’t open so we are waiting for a Marvin tech to come and fix it. Whaa-whaaaa.

Yesterday a friend of ours commented on how this “house is lucky to have us taking care of it” and it really warmed my heart. This is a great house. And I happy to take care of it.

Until then… thanks for being here!


Follow

THE OFFICE / GUESTROOM : THE PLAN

 
83CC561A-8165-4707-8F0D-8E0AC11E8102-FC6FCBB7-ECEF-4C9B-B4A5-718ED937366B.JPG

Here we are at the homestretch of 2020 and we are preparing for Home Renovation No. 5: The Office / Guest Room!

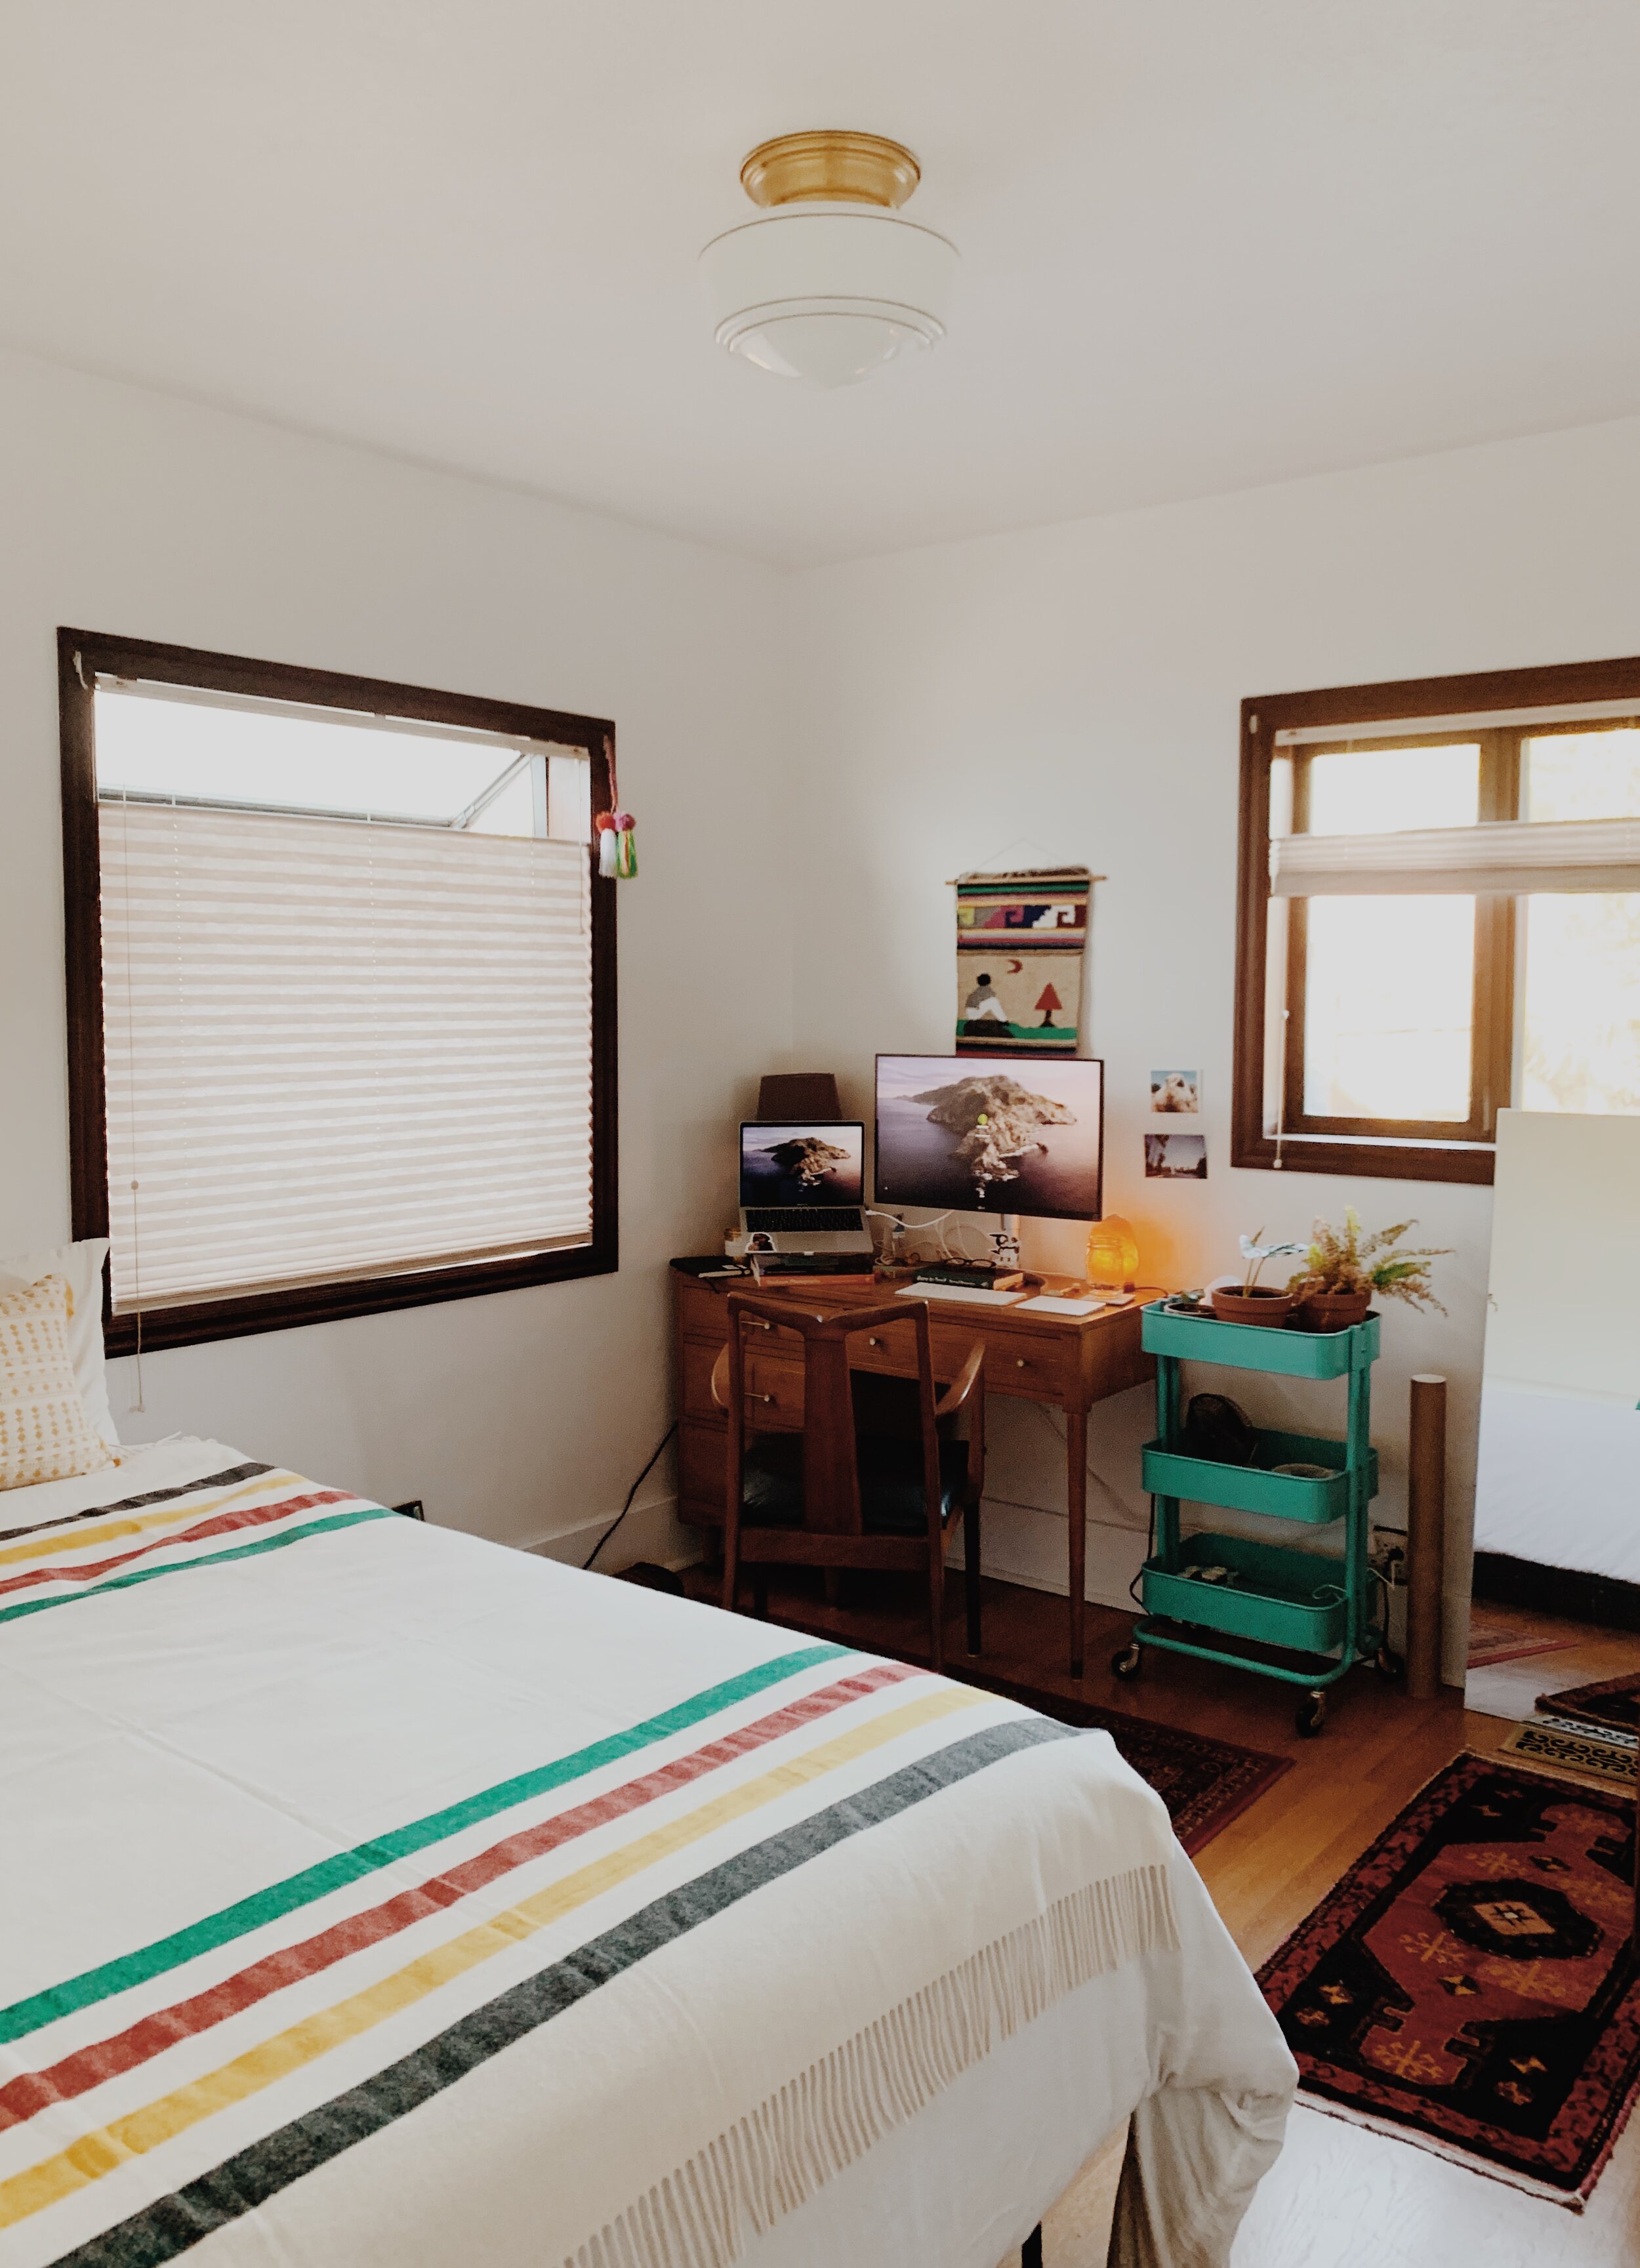
I started working full time in here since the pandemic has required us to WFH. The windows in this room are the same as we replaced in our living room, but worse. It didn’t really bother me too much since weather was warming up and drying out but as soon as the rains came back with Fall it was clear: we need to replace these ASAP. The giant garden window not only let cold air in but also leaked creating a perfect storm for mold to grow. So, I am now working from the dining table, again.

Our only spare room in our tiny home was always meant to serve as a guest room. Danny and I used to love hosting our friends and family who would come up from LA quite frequently so having our extra queen bed set up in here was perfect for our parents and friends traveling in twos. But with travel and visitors being on hold and the need for a dedicated space for me to work until further notice, we started to re-evaluate the use of this room and having a giant bed in here just didn’t make sense anymore. So, we decided to lose the bed and invest in a nice sofa sleeper that will still be large and comfortable enough for our guests while also creating a more office-like feel.

Since Danny works out of the detached studio and uses our basement as his music space, this room is MINE. And though we typically always agree on how we decorate and curate our home, this is an opportunity to create a more fun and bold - colored space. With that - I am excited to announce that we have finally purchase the velvet-green sofa of my dreams!!! But since it’s still 2020 and everything is a dumpster fire, the delivery of it has been delayed until March. But, that’s okay - we have work to do….

This renovation stretches farther than this room… We have decided to replace ALL remaining windows in the house which include the two upstairs and the four in our kitchen. We will also be smoothing the ceilings, adding in crown moulding, and replacing the trim in both the office and hallway. And lastly: finishing our “new” closet under the staircase that we have put off for two year… but more on that in another post, soon.

Below is a photo of the room when we bought the house. Since then, we have and changed the lighting to a beautiful surface mount from Schoolhouse Electric. Little changes made a huge impact.

officeOLD.jpg
2C321D5B-F8CA-4C67-84CD-C436B58DDC3A.jpg

I threw together a mood board for the room to get my vision in line. I will be using a lot of my existing furniture as can see above with adding in a few more accents to make the room both functional and styled. My color palette will be more rich than the rest of our house but still keeping in line with my heavy use of woods and neutrals (using the same paint colors as the living room) to keep my natural inside-outside vibe.

Work is due to kick off mid-to-late January (I hope) and will sharing updates as the project moves along!
Thanks for being here!

Inspiration Photos: 1 / 2 / 3 / 4


Follow