OUR EXTERIOR: THE PORCH


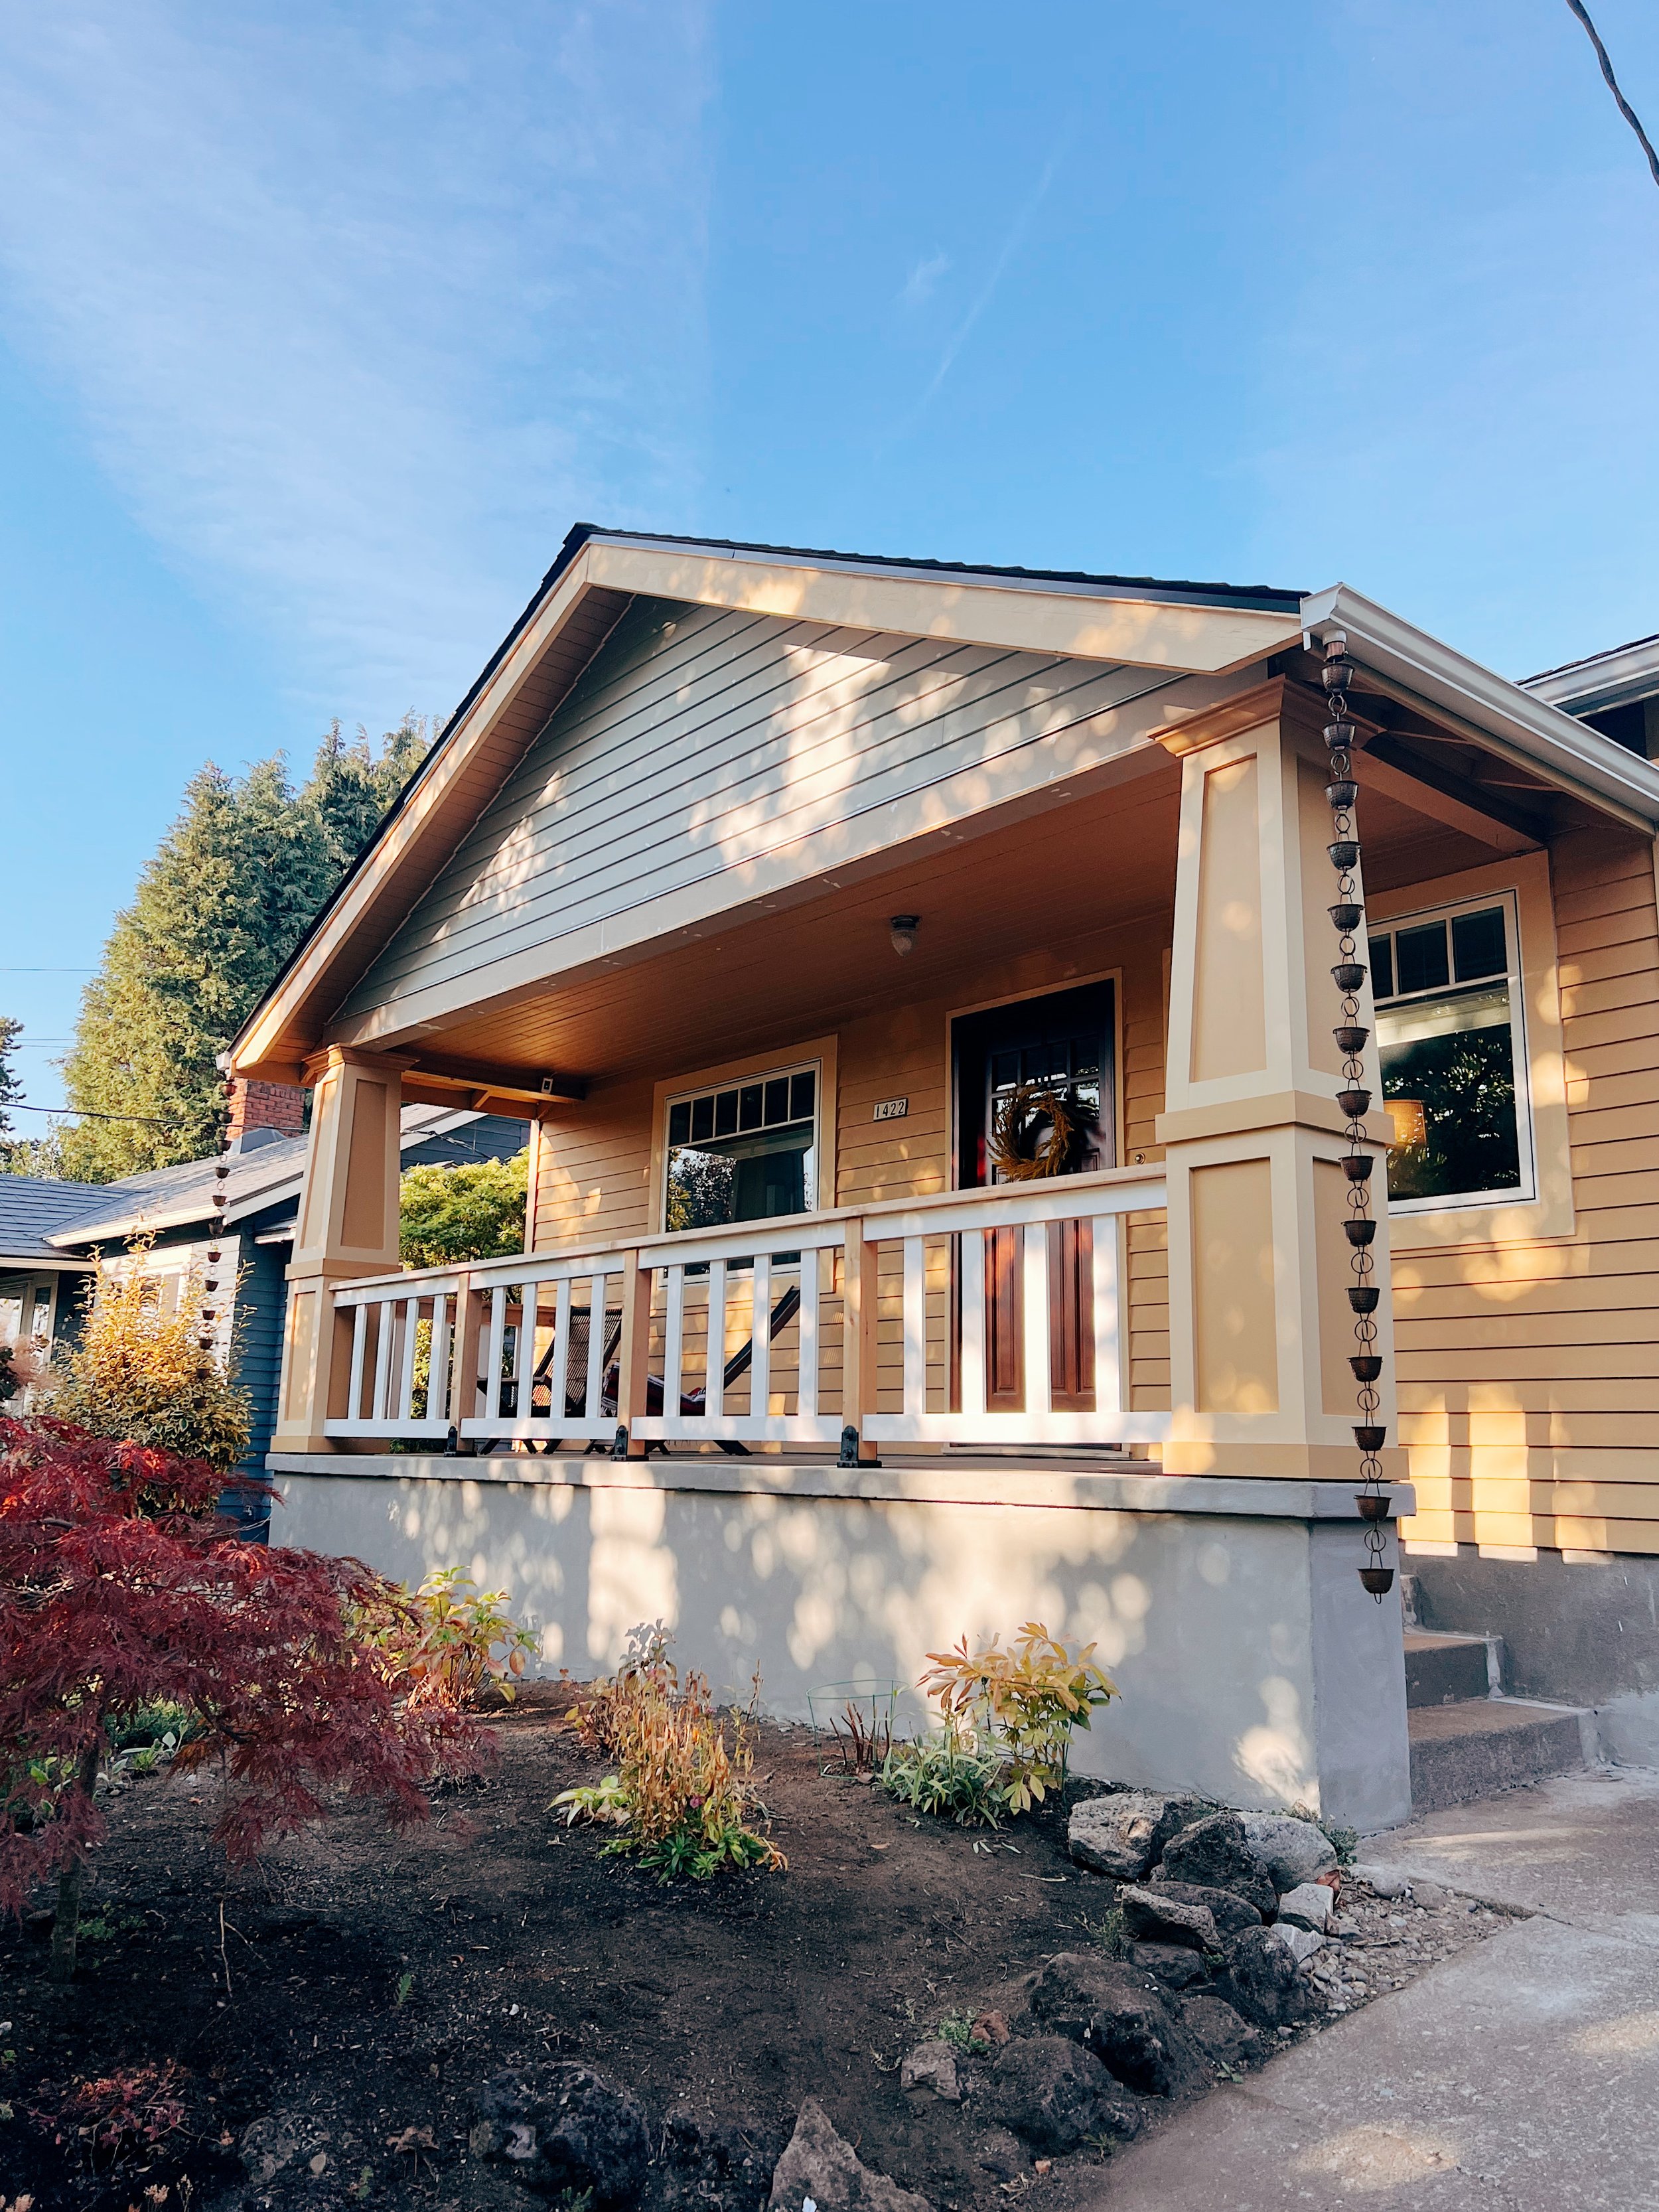
Our one and only big house project this year: The Porch!
After speaking with some GCs earlier this spring and getting pricing for the remainder of our exterior projects we decided to break it down into a handful of smaller jobs. First up is the porch! Apart from curb appeal, we really want to tackle this first to make better use of the space and have a covered place to sit outside when it rains.

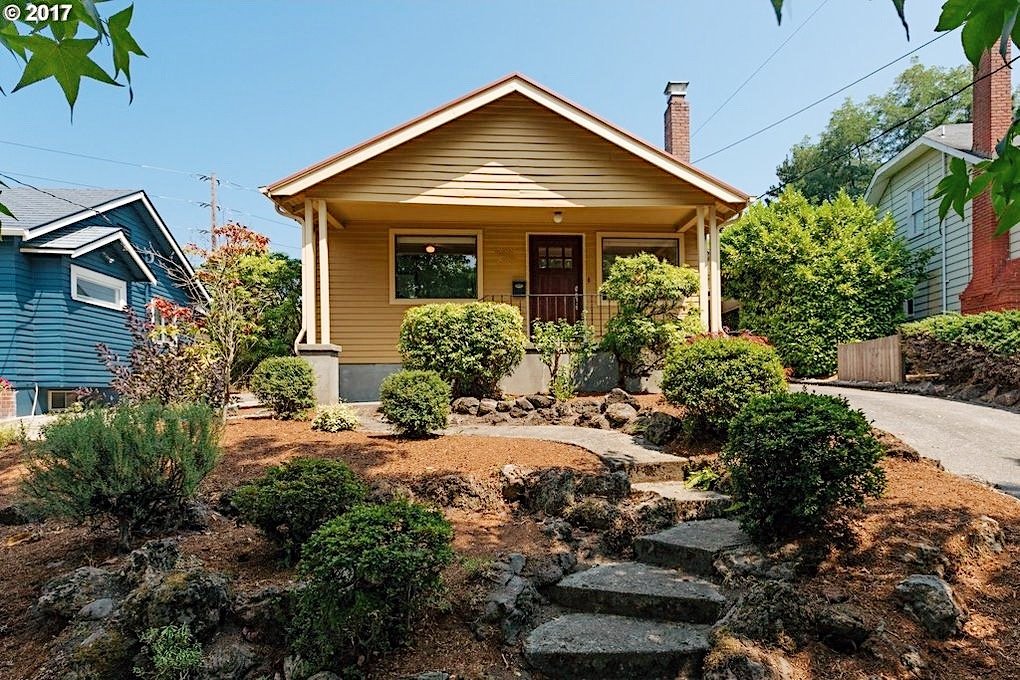
BEOFRE

BEFORE

After many walks and bike rides in our neighborhood we already had a sense of how we wanted this to look while sticking with the 1924 era of the home. Luckily, Danny is really good at SketchUp and drew up a to-scale model which came very handy when conveying our vision to contractors. In addition to replacing the header and siding, we wanted to extend the porch and re-model our posts and railing.

After that, finding the right contractor was the real mission. As luck would have it again, one day when I was on my run I passed by a house a few blocks from us getting the same exact work done that we need AND what seemed like the homeowner was outside. I first ran past feeling too shy and invasive, but I turned around and introduced myself. I asked her how their project was going, are they happy, how’s the crew, etc. I am so glad I did this because after the roof fiasco we made a promise to never to use anyone without getting first hand feedback. She said all great things and gave her thumbs up so I gave them a call, we met, we liked the guy, and we got a quote. Some things felt fair and some felt high. But, first to follow the rules, we also contacted a few other recommended GC’s to gather other quotes. Those others either were ven higher and pushy, never sent us a quote or just fell off the side of the earth. Who knows. Either way, we ended up hiring the first guy. Eight weeks later, work began!


TOP
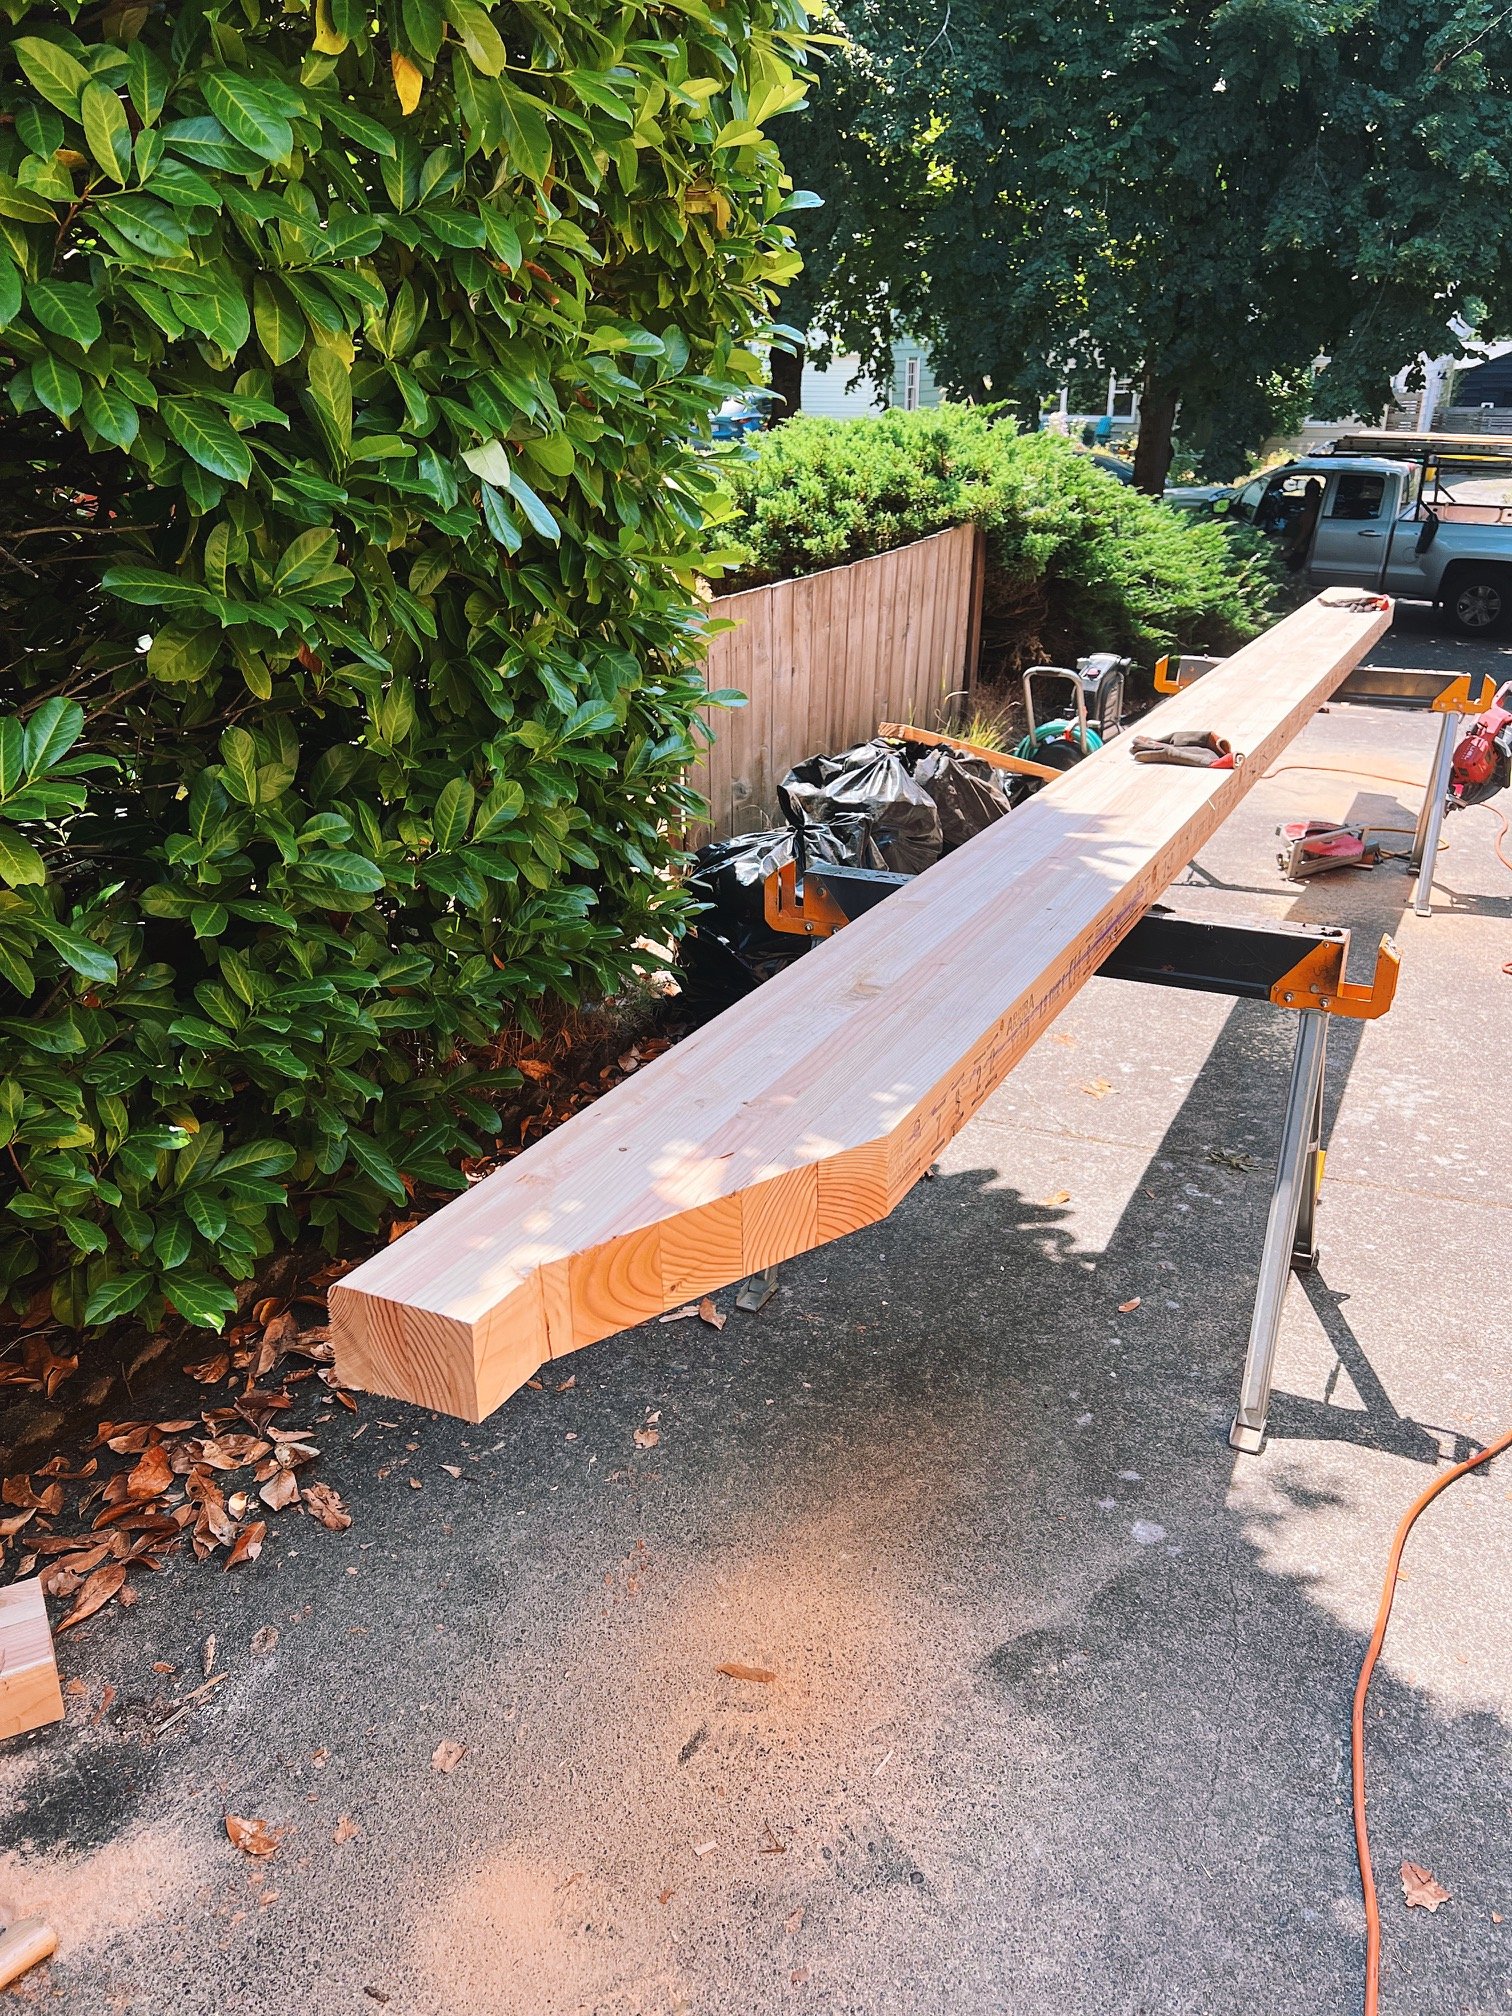
Top to bottom! The header has been sagging ever since we bought the house and it’s been driving us nuts. Luckily it never got worse, just stayed ugly. The plan was to replace it with a single 25’ glulam beam. This would increase overall support and is incredibly durable. When the crew started demoing we were able to see that the existing beam was actually six smaller beams nailed together, and not well either. No wonder! At least it was a relief that nothing was actually sagging and it was just poor craftsmanship. They also removed all the cedar siding above since it was uneven and old. After this was complete I couldn’t believe already how big of difference this made. Straight lines! What a concept!

MIDDLE

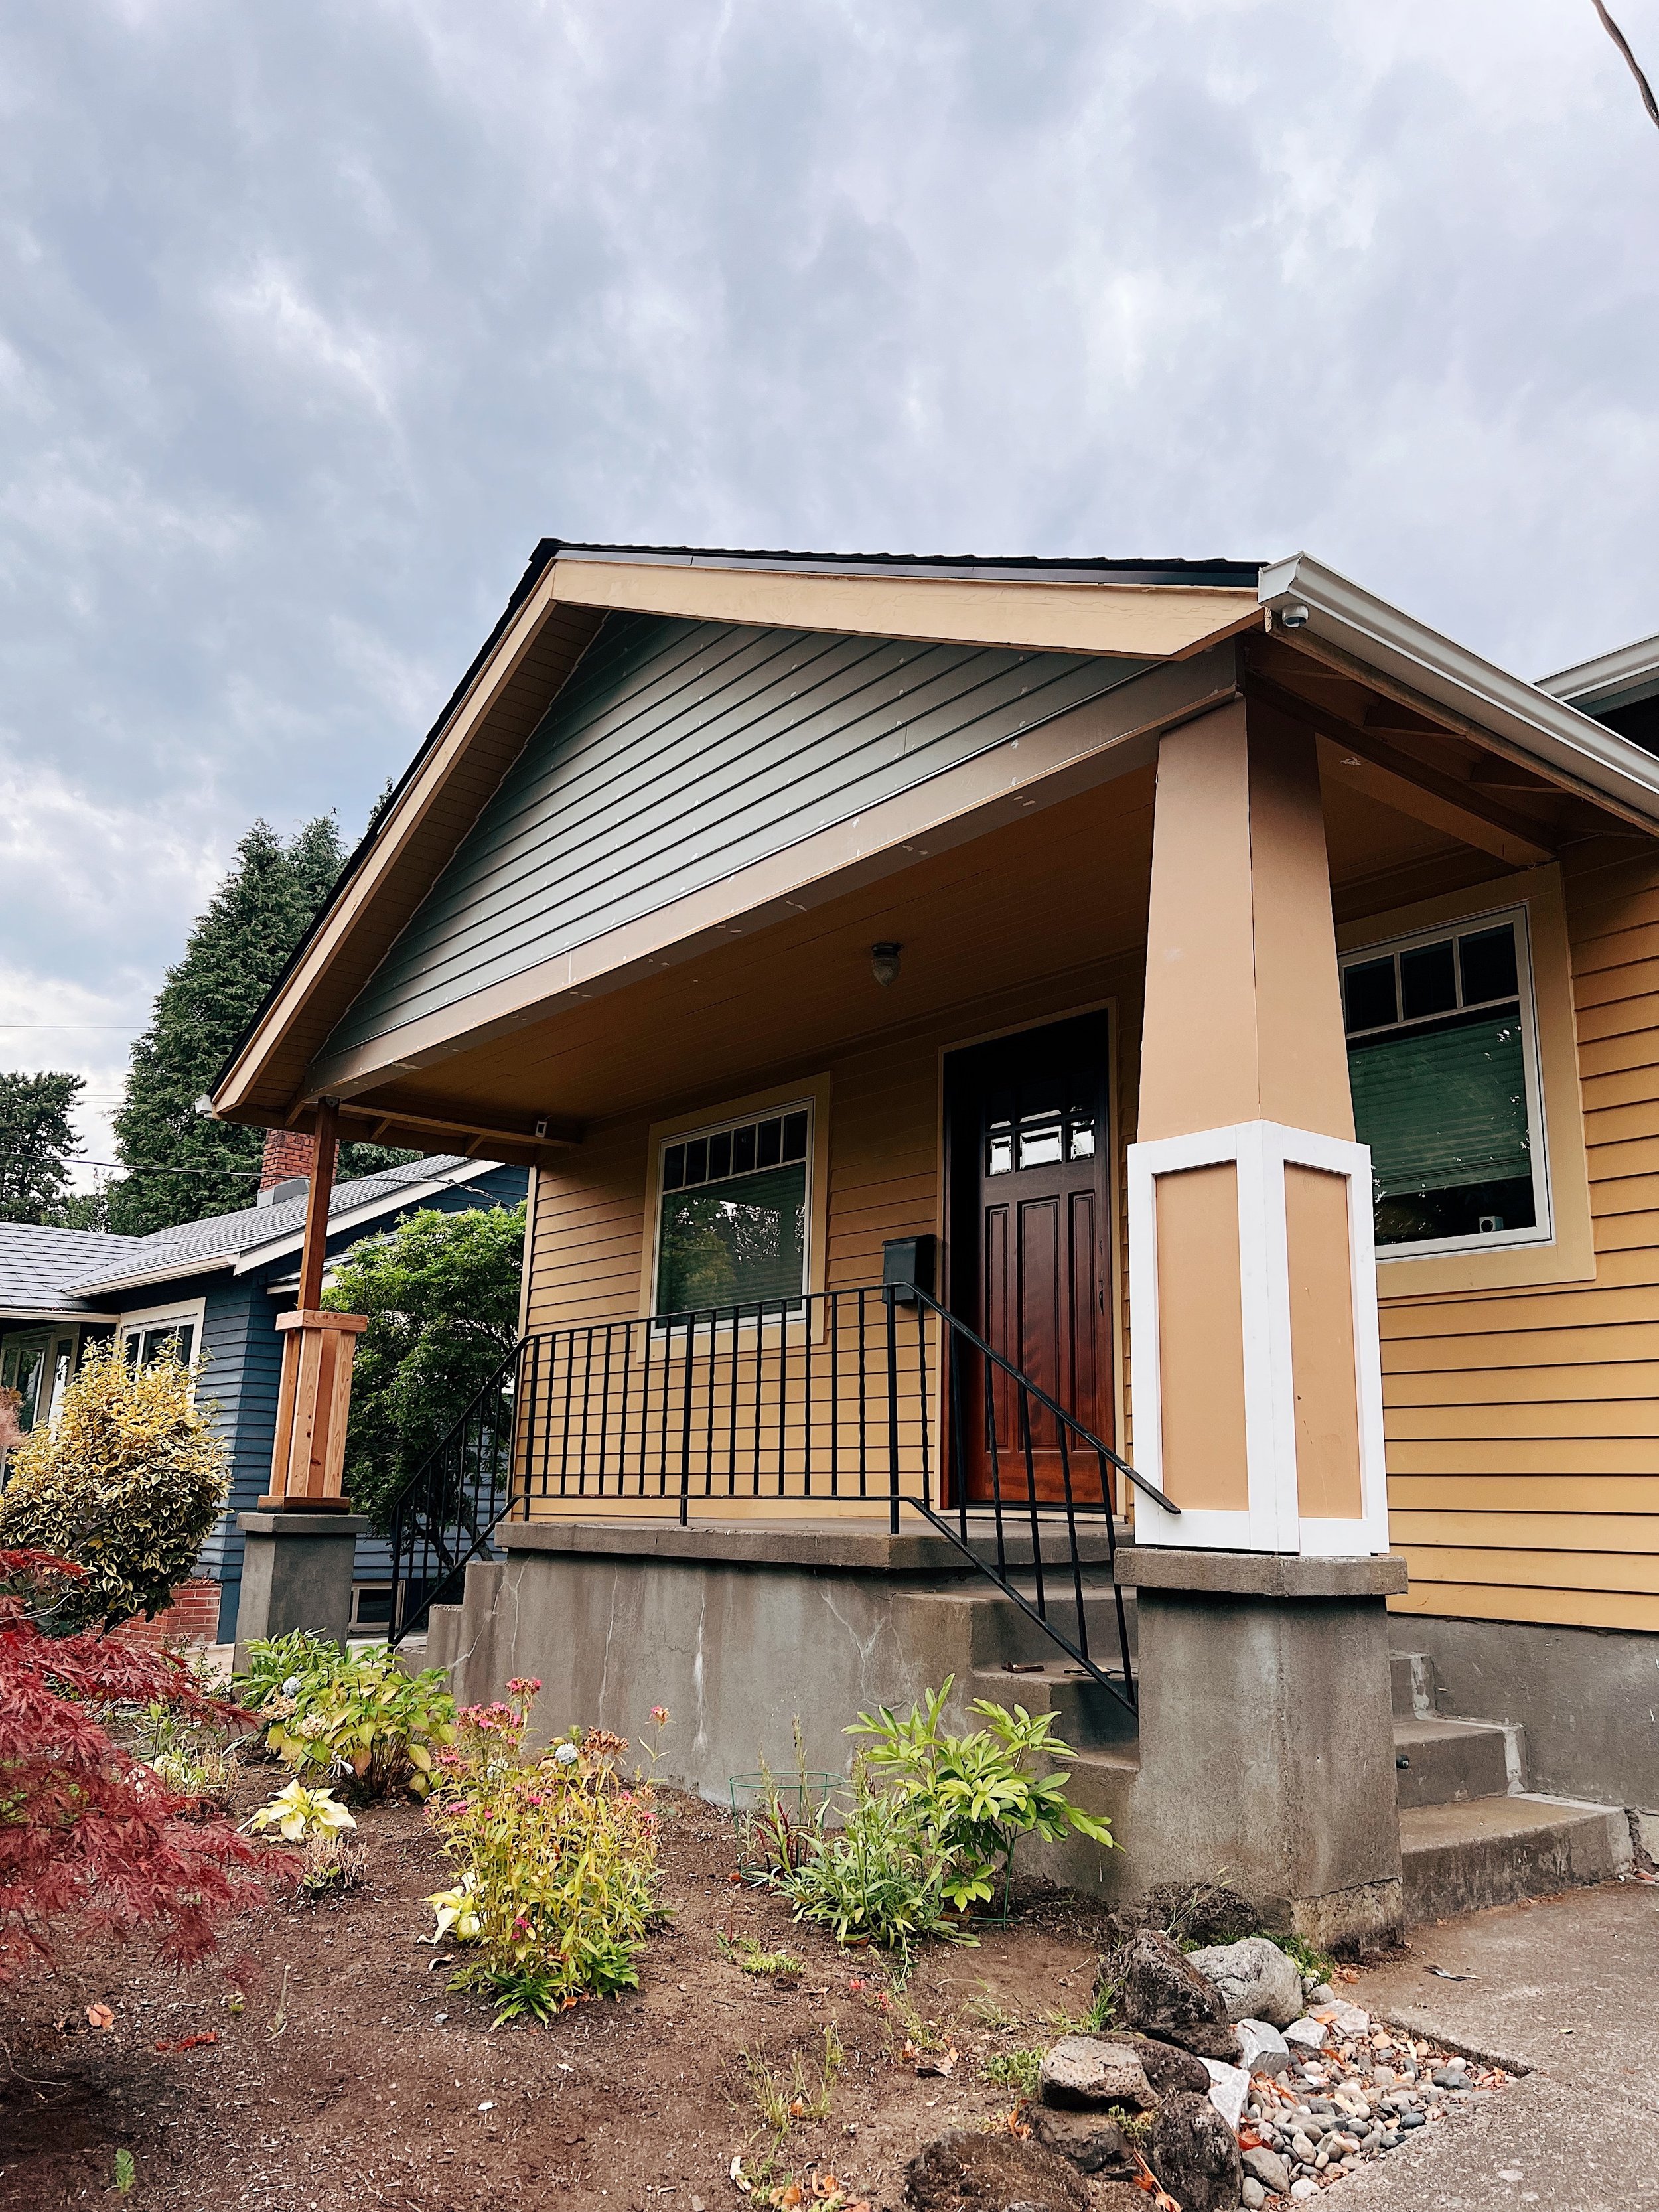
Next: The posts! My god the posts! Another part of the porch that we have never loved. Literally four 2x4’s just standing there looking like crap. Our GC also pointed out that they were actually never properly anchored so literally just standing there. When they went remove these they just pushed them out. What a joke. Anyways, back to keeping with the 1924’s era of the home… we wanted to do a thicker, tapered post with moulding because we all know I love it. Danny also drew up an awesome detailed rendering of what he wanted. The carpenter, Vlad, was so great and he made our dreams come true creating exactly what we wanted. He followed our design to a tee and truly was a craftsman at what he does. And he did it alone! Vlad is welcome to work for us again anytime! We also replaced a few of the fascia boards ourselves.

BOTTOM

Last but not least: the actual porch. We had two sets of stairs: one leading up a little pathway from the sidewalk and then another from the driveway. In the five years we have lived in this house, I have only seen the middle path be used TWICE. Everyone goes up the driveway. So when we decided to extend the porch out I wasn’t concerned about losing this option.

For this part, we hired a different GC who specialized in hardscaping. My colleague at work had used this guy before and gave her seal of approval and once again first hand feedback did not disappoint. To make things look seamless, he first demoed the existing top portion and front facade. He then framed out what would be the extension. Doing this prevented us from having to demo the old stairs and everything would be skim coated to look solid. They then filled in the hollow parts with what seemed like all the gravel in the world.

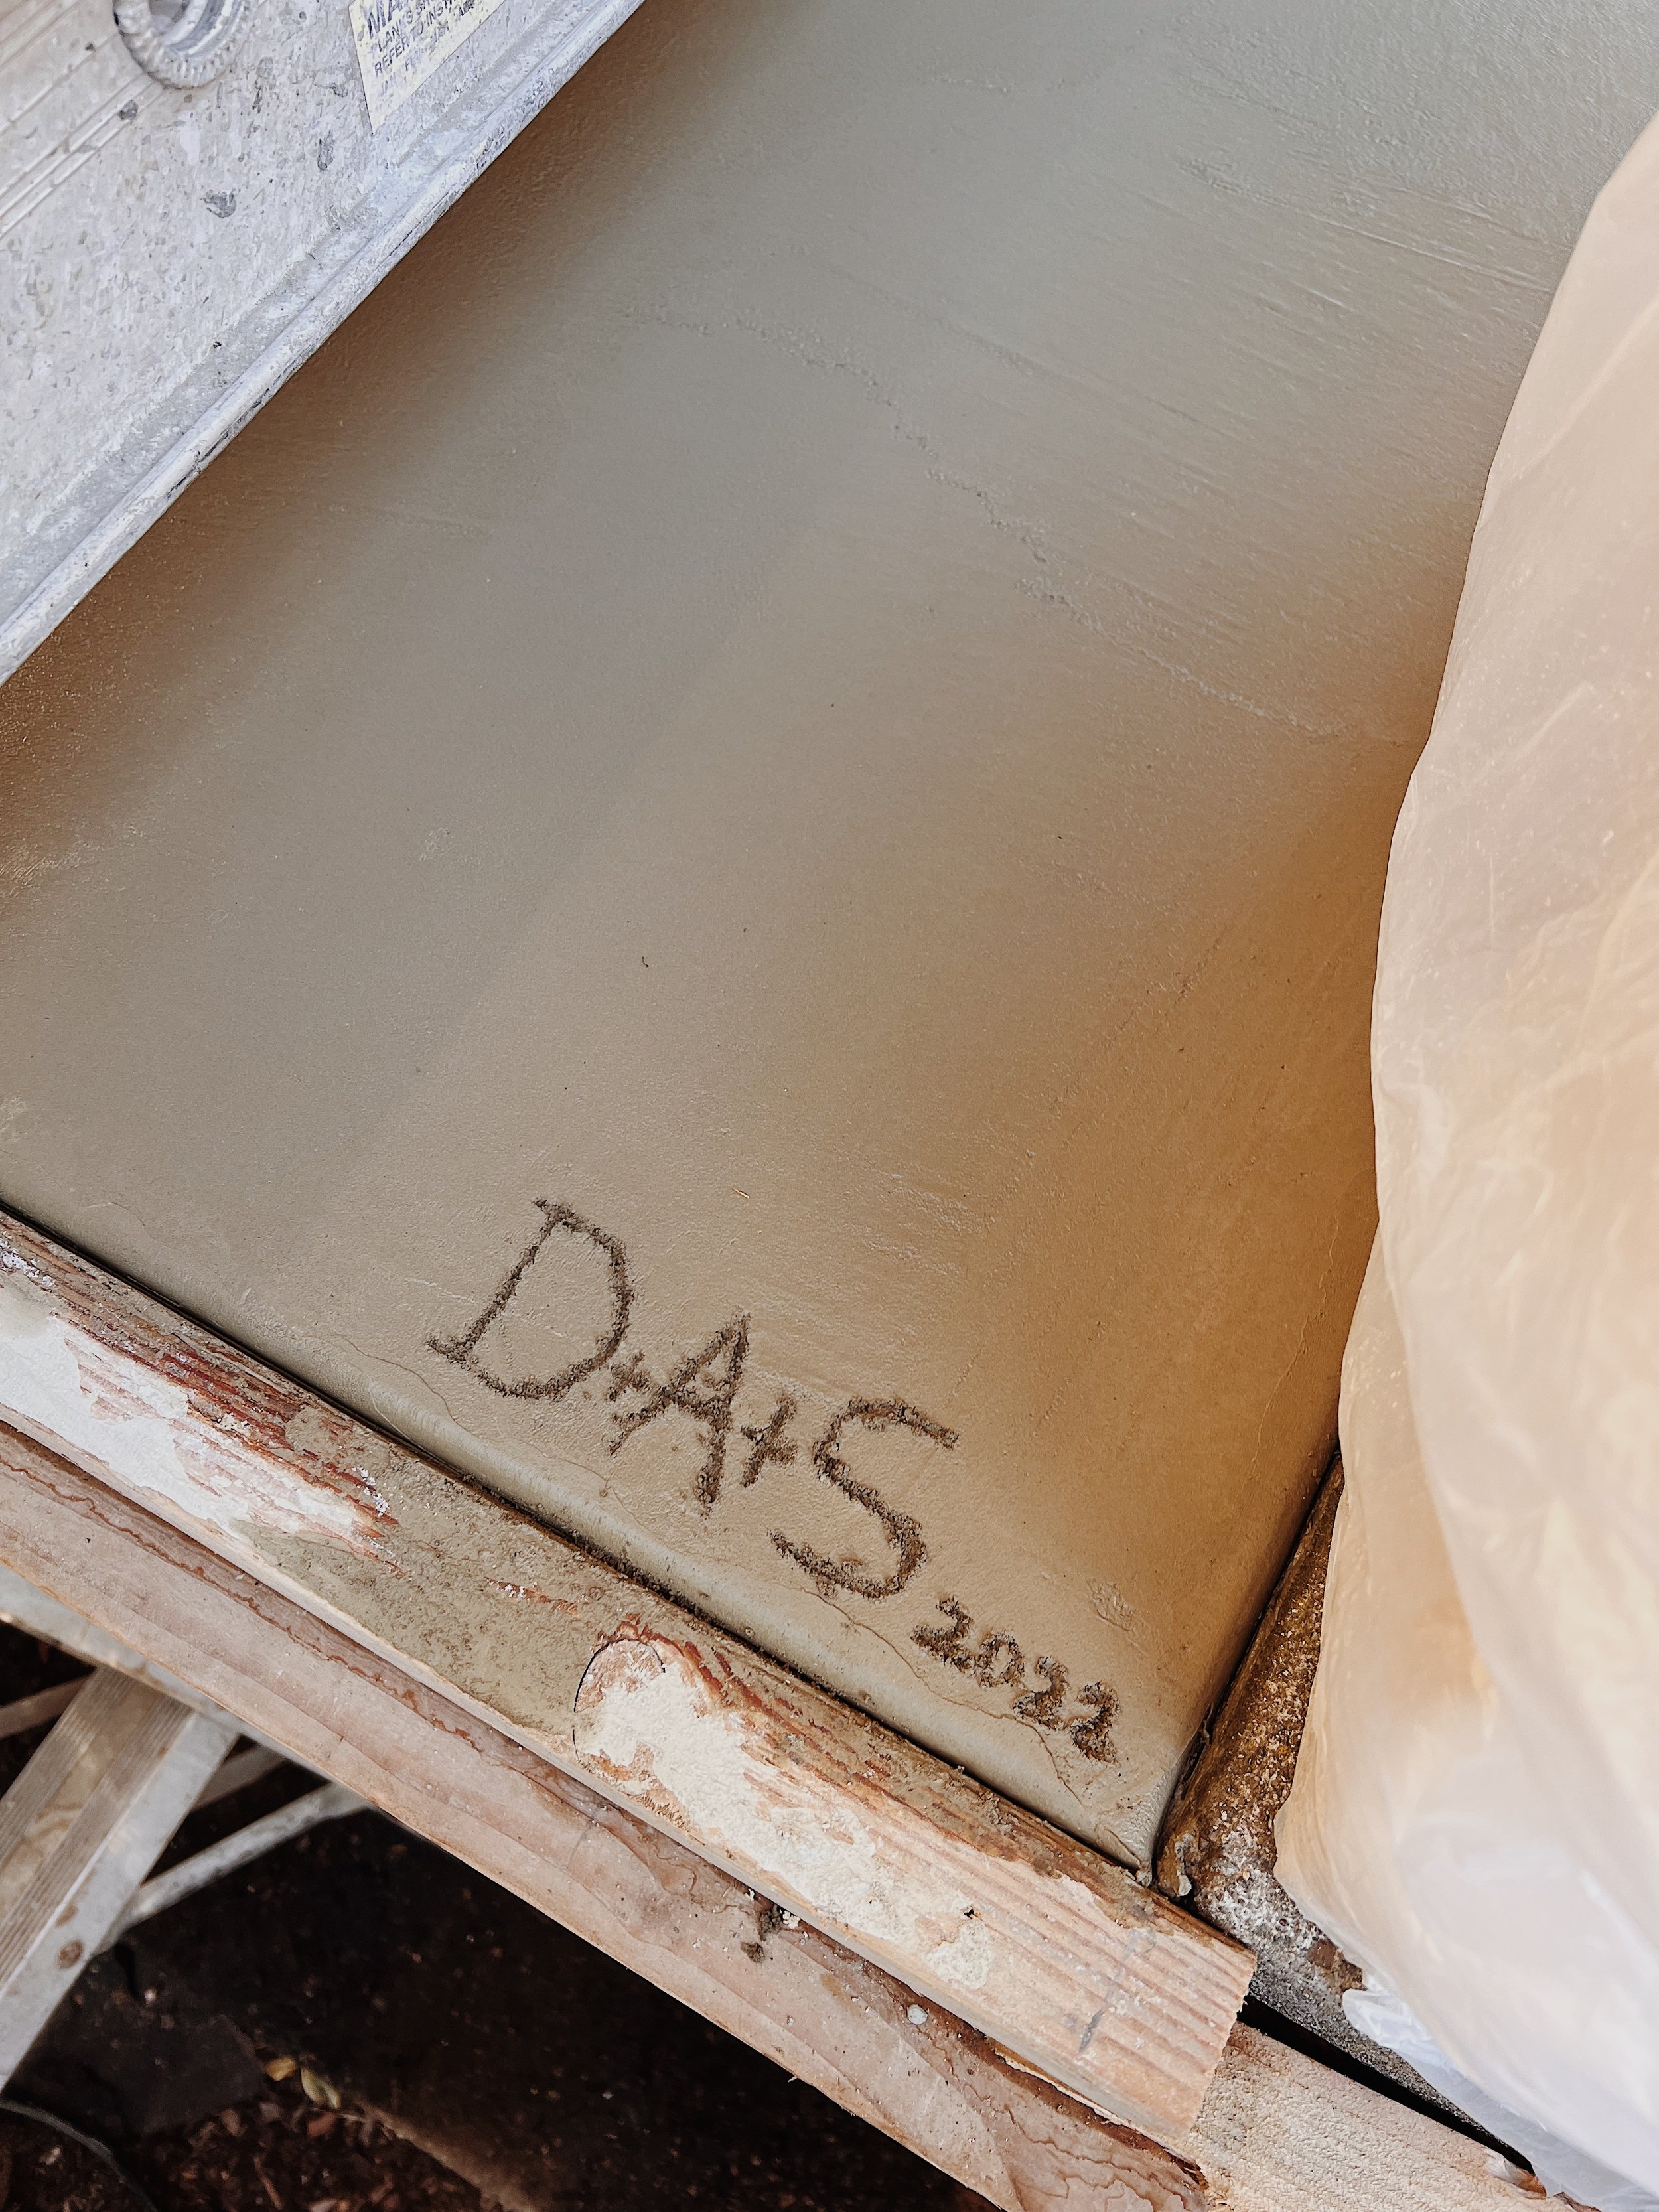
After, he then had “Mini Mix” filled in. The whole process was fascinating and seemed to satisfying. It was so much fun to watch! Also, once the concrete was poured and set enough, we of course etched in “ D-A-S 2022” for “Danny-Andi-Steve”. I couldn’t love it more.

Finally, but not least, we had our new railing installed. Welcome in Contractor #3! Once again, full recommendation from not my colleagues. And prior to us using him, our friends had him build their deck. We were sold. Due to the nature of our the old house and existing factors, the porch was probably the most challenging piece. Silver lining, there’s almost nothing a conversation can’t fix and it turned out perfect. Danny and I picked a picket that match the width of the trim and is also sandwiched between the railing so it looks good on both sides. Just like things with this renovation, it looked like it should’ve been there the entire time.

Caulking and painting was by the far the least fun part of this renovation. Though we are hoping to completely change the color of the paint next year (more on that later) we wanted to paint to match because a year is a long time and we also wanted to protect it. But my mentality when it comes to painting: sucks now, will be happy later - pulled me through.

As mentioned, we could not be happier with out it all turn out it. It makes the entire home feel optically bigger and also physically bigger. Literally a dream come true and can’t wait for many more years enjoying this addition.


Follow

OUR EXTERIOR: NEW ROOF


After we wrapped up the office and remaining window project we thought our next up would be our main bathroom and then the kitchen. BUT as life is lately: things changed, decided to put interior renos on hold, and we shifted our focus on the exterior because it really needs some love. So, from top to bottom, Phase One: WE ARE GETTING A NEW ROOF!

Seemed simple but this turned out to be anything but that. When I started writing this post right at the beginning of the project I had hopes in this being an easy and fun job in which I could happily share. But this will be more a journey of what we learned and what to watch out for. We would never want anyone to go through the same experience.

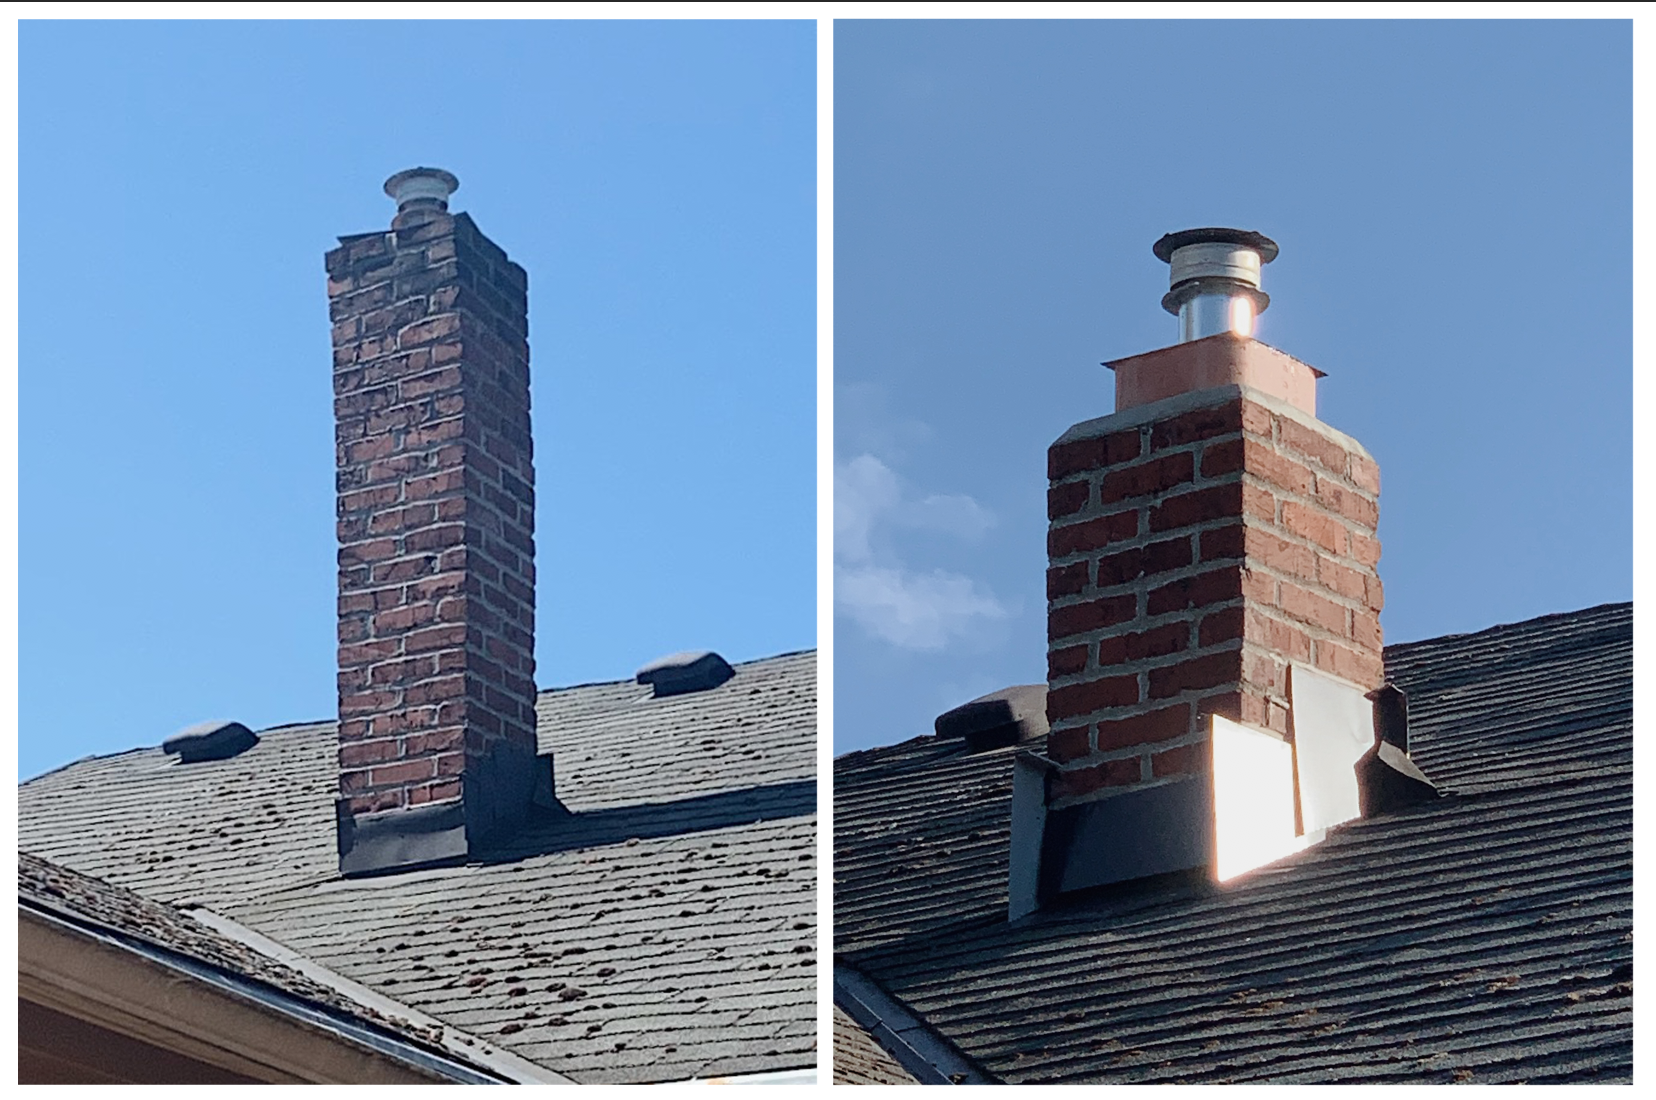
I’ll first start off with ONE of our first hurdles: In preparation for the new roof we also finally addressed the stupid, slanty-old-chimney stack that house’s our furnace pipe run through on the back of the house. That thing has been irking us for years but we kept putting it off. We went back and forth on what the best option would be: remove it to the roofline or repair and bring it down to shorter height. We did not want to remove the entire thing to the basement level since that’s a huge project and I hope to have exposed brick in the kitchen one day. We chose to do the latter. The whole experience with that did NOT go well (I won’t go into detail) but the company we hired had to come out THREE times to repair this. It didn’t look too terrible but the flashing was just awful and mortar just wasn’t sticking. At that point we decided to just take it down to the roofline but the same company wanted to charge us an additional 2k to do that job. Thankfully we have awesome neighbors who offered to help us (when I say us I mean, Danny) do this ourselves. Turned out to be super simple with just a little research on parts but couldn’t finish until the roof was done.

ChimneySS.png
IMG_1927.jpg

THE ROOF

Back to the roof: About a year ago we started getting quotes for the roof because we knew this enviably would need to be replaced. Initial quotes were pretty basic but as we got further in it turned out that we need to do a FULL tear off and start from scratch. After meeting with FIVE roofers we settled on working with All Surface Roofing. Peter, the estimator seemed to be super honest and non-pushy. He even told us a year ago that we didn’t need the new roof right away and should hold out until plywood prices dropped. We continued to speak with him over the course of months and felt like we were making the right decision to go with them. They weren’t the cheapest quote we received but also wasn’t the highest. The company checked out, they had a good reviews, and had no hits against them. Everything was going smooth until the first day…

First red flag: the crew was late and they were slightly confused of the scope of the job. It was also unclear to us who was the lead. All of them showed up in their own cars and clothes rather than company branded but I didn’t think too much into it knowing it’s a messy job and we figured they were just the demo crew and not the actual roofers.

The tear off was INSANE. Having been home for one major home renovation earlier this year, I knew it was going to be loud but this has hit whole new levels. Noise coming from ABOVE is way more terrifying. At one point they were knocking and scrapping so hard that a small surface mount light upstairs fell off. Just as we suspected, the tear off proved to be a lot more work than a normal roof change due to all the cedar shake underneath. It was a mess outside and we are STILL finding nails. The crew also was not following the weather and tore off the entire front right of the house before a downpour so water got into our attic.

IMG_1974.jpg

The entire job was quoted to be done in 3-4 days. By the end of the 4th day shingles had just started to be put onto the house and Danny’s studio hadn’t even been touched. They ended up having to come on the weekend and into the following week. The crew started to thin because they needed to be on other scheduled jobs so work slowed down even more. Every day they showed they would say they were only a few hours away from being done but the entire day would go by with no end in sight. One of the days they left around noon so we figured they went to lunch. By 3pm they were still not back. Danny and I had a complete freak out thinking they just took off. After calling a few times to just be told “We’ll call you back” and never did, the two-person crew comes back letting us know they left to work another job! Zero communication or consideration for us. We understand things take longer than quoted but this whole thing just started to become intolerable.

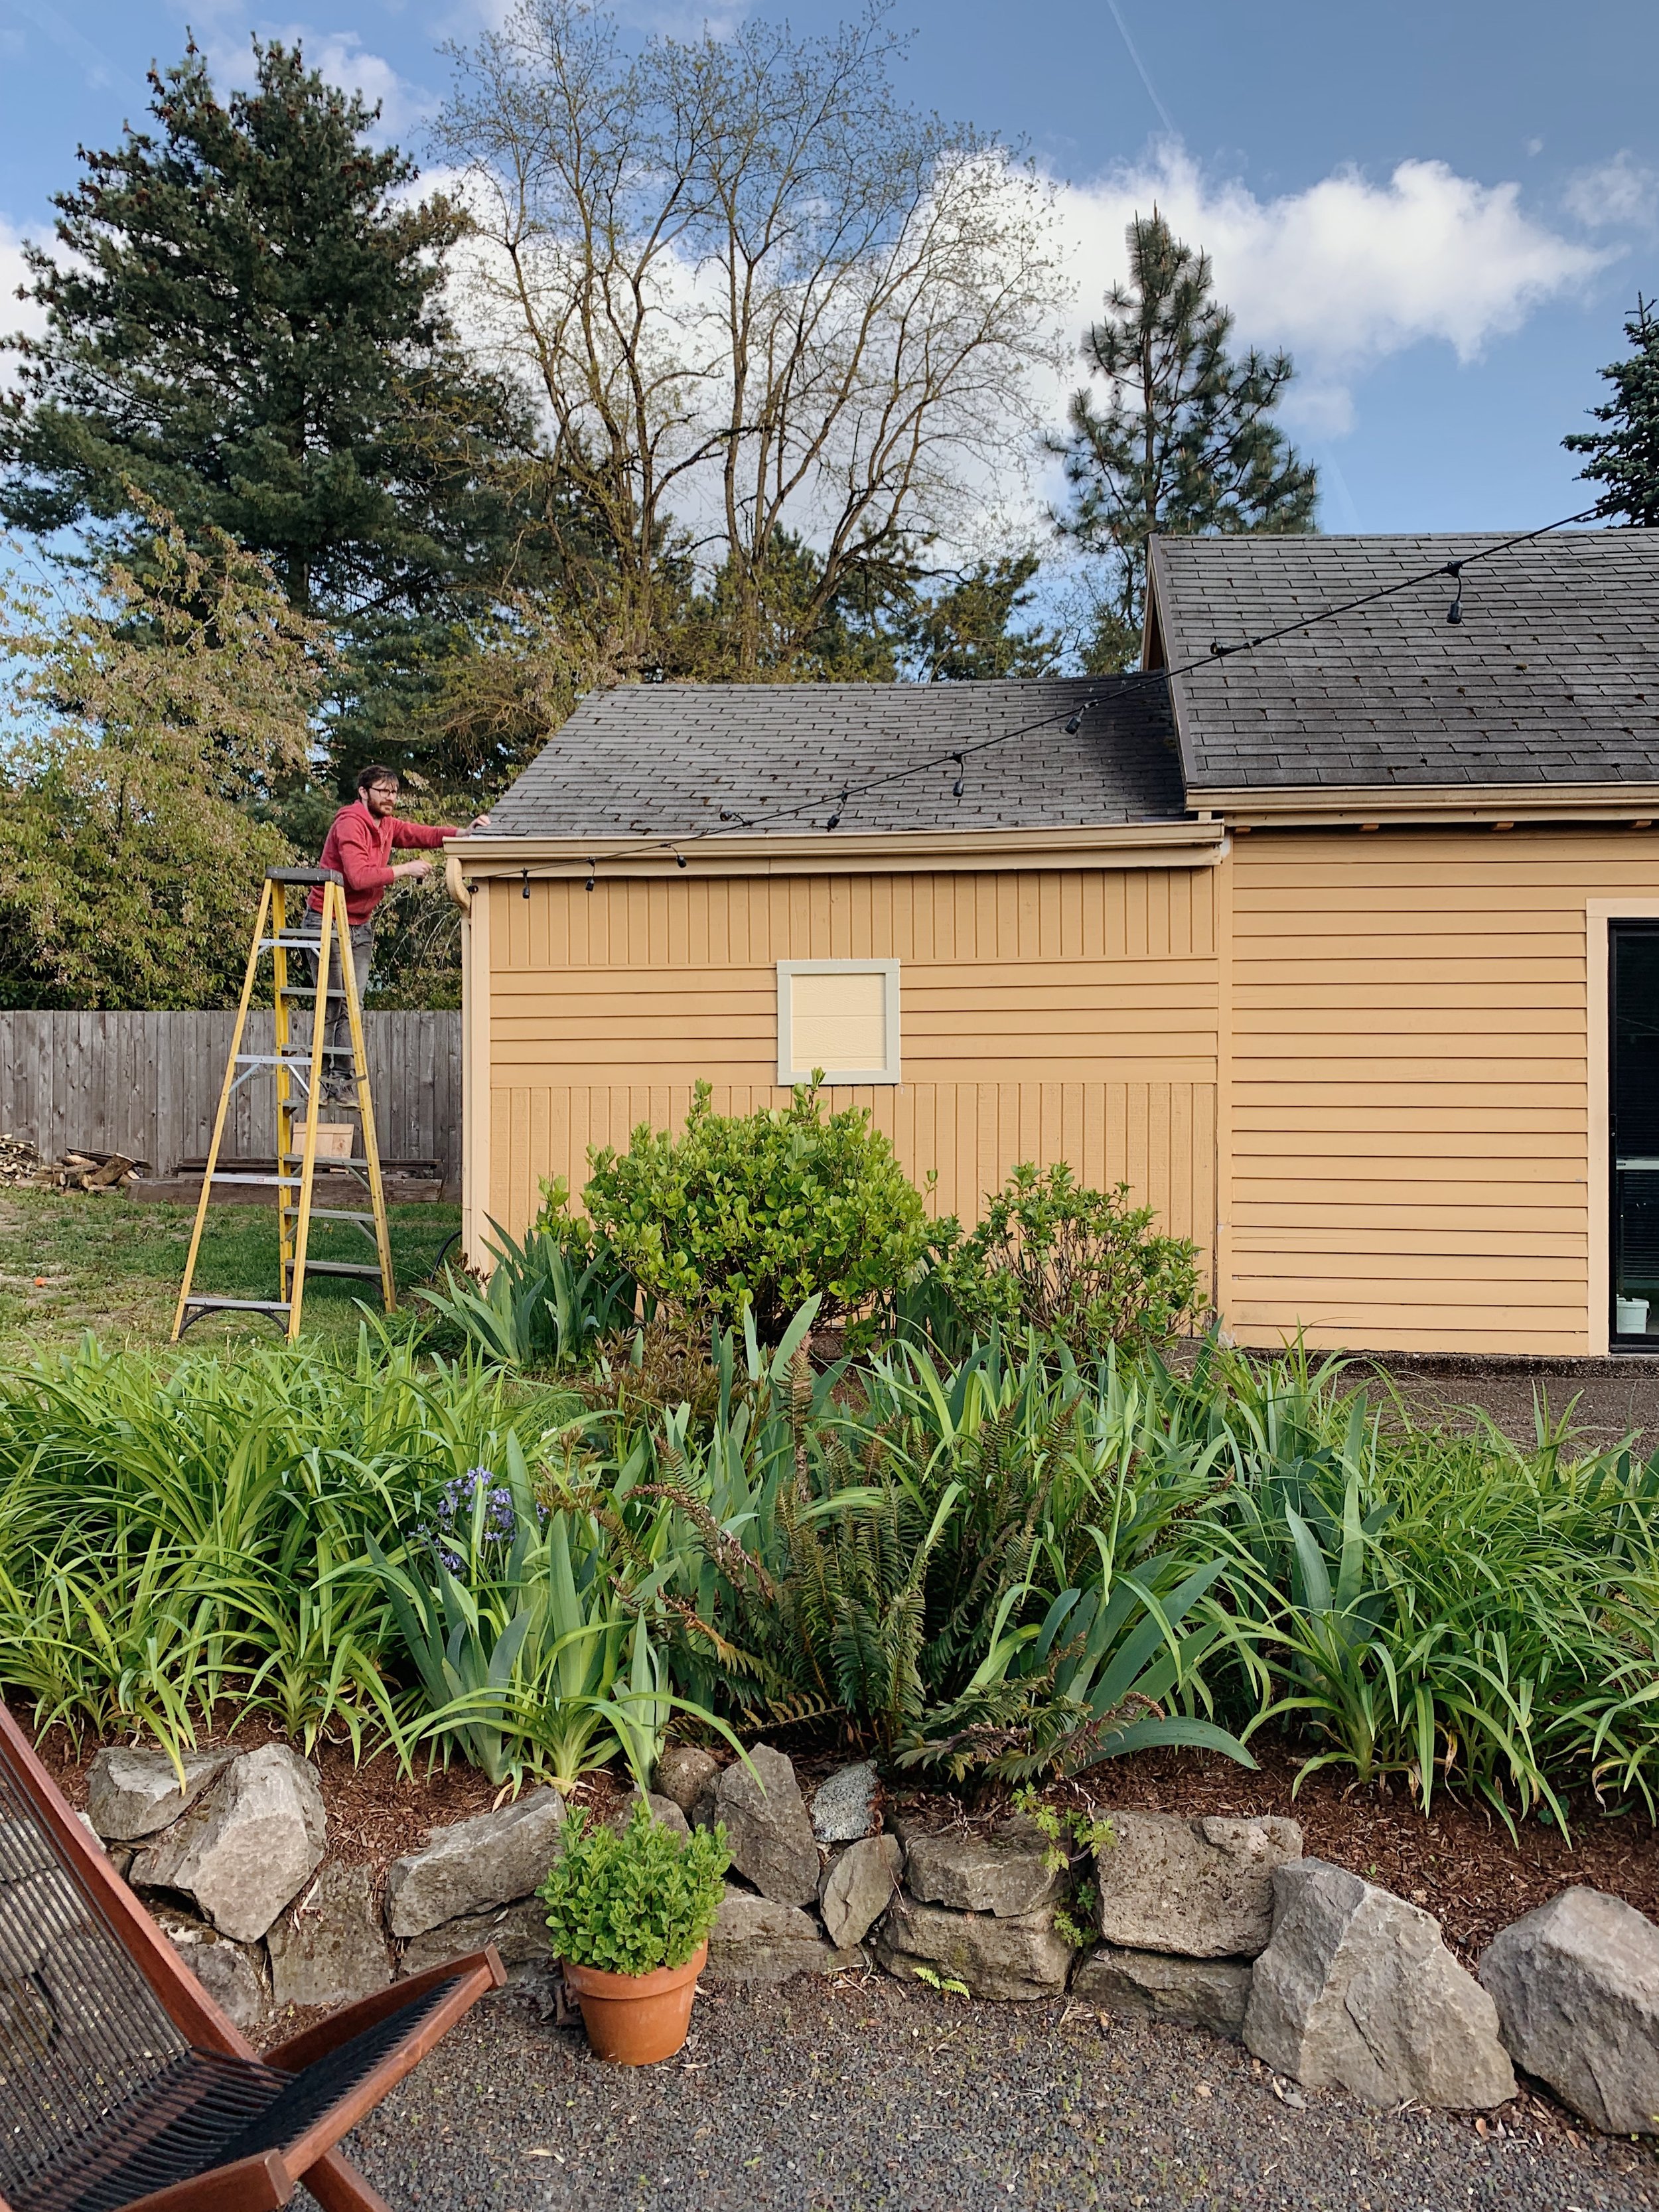
At this point we started noticing a lot of errors and poor craftsman ship. When looking from the back of the yard we could see one of the edge vents was crooked, fascia boards were cut so poorly they looked like a child did it, materials were missing, etc. Danny and I started to compile a list of items and after many emails and calls they finally sent over the “Project Manager” which we had never seen yet. He kept saying everything will be fixed “tomorrow”. Giving him the benefit of the doubt we agreed. A few more days had passed and still the job was not done errors continued. They even removed gutters, bent them in half and threw them away so we had NO gutters until who knows when.

By DAY EIGHT, we had had it. We were able to get the owner on the phone and they admitted that this crew was actually sub-contracted and not from their company at all. It was crushing news. The amount of trust for this company completely shattered. The owner agreed to create a detailed punch list that must be followed by THEIR “home crew” to repair/finish and for us sign off on.We appreciated that but nothing was going to fix the amount of emotional stress and miss work brought by this. We even ended up firing them for the gutter portion of the project and hired someone else though it would be a month out because we could not handle anymore errors.

After weeks the roof was complete and we haven’t had any leaks - yet. There are still some issues/damages to the house that were created from lack of the crew caring or paying attention but everything is fixable, as frustrating as it is to do.

If you’re planning on getting a new roof or have to do a tear off such as this, here are some lessons learned:

  • ASK MORE! Who will be there day of the project? Get their name before-hand. Ask if it will be their crew or do they sub-contract. Get that in writing in your contract or via email.

  • Take a million photos. I thought I took a lot but there were things I missed. Take picture of materials, labels, everything.

  • Get a list of materials is possible. Get a break down of costs prior to signing. If they can’t provide it, don’t hire them.

  • Do they cover damages to windows? (One of our new ones got damaged - they ended up sending a check for it… $900+)

I know these seem obvious and we thought we covered all corners but we missed things. I took this all really personally because this was our home, we are trying to improve it, and this was a very expensive project (close to $25k at the end - thanks supply chain issues!) and you should only have to do a roof on your home once, hopefully. But, what is done is done, we learned A LOT of valuable lessons, and the new roof at least does look decent and has improved our home. Here are some more before/after photos. Some going back to before the windows even.

GUTTERS

A month after the roof we finally got our new gutters installed. We hired Armada’s Exteriors after hearing about a good experience our friends had with them and it was the best choice we made in this whole project. They went up easily and the crew was professional and kind. White gutters is not our ideal with the house right now but leaves us with a blank canvas for when we are ready to paint.

We decided to install rain chains rather than a downspout and I am so happy about these. They add more personality to our home, make a calming noise when rain flows through them, and fun to watch. I know they won’t stay shiny and copper forever but love them for now.

We still have a long way to go to making this home where we want but we have already come far. Going to take the next 6+ months to chill on major projects, save, and prepare for Phase 2: Siding Repairs & Paint!


Follow

RENOVATION NO. 5 : UPDATES

 
IMG_1605.jpg

Remember how I said renovations take longer than you think? Yep, I am still correct. What we thought was going to be a quick project has really turned into something larger. It took the contractor almost three weeks alone to get in and out and we under estimated the work for us after on top work working full time. So here we are: WEEK 5!


That being said we have made huge progress! All EIGHT windows have been replaced, all new trim is installed, the new closet is huge, and our future breakfast nook area is looking cute as button. TWO WEEKS ago we began painting and WOWOWOW it’s a lot. We considered for a minute in hiring someone but with covid and us not wanting any additional outside people in our home and longer-lead times we decided to once again: to paint ourselves.

23F60E98-D070-4062-9C0E-07C6064119A7.JPG

I was hoping to kick off the painting the day after the contractor packed up and left since it was going to be a long weekend but we didn’t have everything we needed as we thought. Our fault for not noticing earlier (and I just wouldn’t know) but they did not PVA the drywall. Easy trip to Home Depot. BUT then it snowed..a lot (See Portland Snowpocalyse) and we couldn’t get our car out for FOUR days. So we had a slight delay. It happens.

EACBFAD5-27B0-4179-8677-C57D2D126A6F.JPG
IMG_1204.jpg

Once we got the painting started it hasn’t stopped. We decided to focus on the office and hallway first. After painting the living room last year I thought the office would be a breeze! I painted it before right after we bought the house and I did it in two days. But with all the new trim and details: it was taken forever. TEN DAYS TO BE EXACT. My lovely friend, Nikole, was kind enough to come over to help again to get me started and I am forever grateful. Then I got the call that our new sofa is ready for delivery so I really kicked things into high gear, took a deep breath, found my inner zen, slowed down, and took on the rest of the painting all by myself. I never thought I could do it but I can do anything, right? I conquered edging and painting the crown, baseboards, and window trim without using ANY TAPE! I rule! I even took it the next level and used a teeny tiny brush to hit the details on the baseboards and moulding. We are even giving the very awkward closet a bit of a facelift with some small changes and fresh paint… it needed it.

IMG_1535.jpg
IMG_1538.jpg

Though it’s been A LOT of work.. the results have been worth every back-breaking minute. We cannot be more pleased with what the office is becoming. And.. sofa is delivered tomorrow! I can’t wait to move my workspace back in there! It may be the best room in the house…for now!

Snapseed (5).jpg

Due to the main and closet doors being warped, we also made the decision to get new doors to match the existing style with using our original hardware and mortise. Yay… more painting!! But turns out.. painting doors is kind of my favorite. I love it. I used a super smooth roller and it was breeze! Pro tip: go easy on the paint to prevent dripping underneath on the other side. Always roll over the backside edge when the roller is in need of paint to smooth out! Don’t forget!

7E2091F3-4B8C-4036-8C30-CCA540B45284.JPG

As I said, we used the original hardware. My beloved vintage glass knobs! I would never let you go!! The hardware… was a mess. So I did some interneting and found that I could easily remove the paint by soaking them. So, we went down to the Goodwill, picked up a $3 (it really was $3) crockpot, because lead…, put those cuties in there with some water, and let it soak for 8 hours. Before removing, I recommend wearing a K95 and gloves because lead… I dumped the water and carefully removed the pieces and used a flathead screw driver and the paint literally just fell off! Viola!! AND turns out our hardware are original Stanley Work Sweetheart brass hinges! How dare anyone ever painting over these! Shame on you, previous owners! I plan on shining these up this weekend with a little baking soda and steel wool!

7D111829-078C-46D2-BF70-6ECD64C30821.JPG
IMG_1648.jpg


OTHER UPDATES!

IMG_0548.jpg

Our cutie breakfast nook is coming along! Though neglected lately.. the change is so drastic. And to have opening windows… I can’t wait for summer! Once we get to working on this spot I’ll post more. But for now, it’s cozy as is and great place to store all our paint supplies.

IMG_9994.jpg
IMG_1654.jpg

Another neglected area of the home: The Hall. Also looking super fresh. Though we heard our contractor ask her assistant “Why would anyone put crown moulding in a hallway?” I am 100% happy with our decision. The rest of the house has it (or will) and now it looks finished! We also removed the ugly, weird vent between the hall and our bedroom which makes it look clean and now it’s more quiet upstairs. Double win!

IMG_0966.jpg

Lastly, the upstairs windows! We replaced those, too, but it’s small potatoes to everything else. We went with Marvin’s double-hung rather than casements because I worried about birds flying into them and the hot summer nights we use a fan. But sadly the one in the landing doesn’t open so we are waiting for a Marvin tech to come and fix it. Whaa-whaaaa.
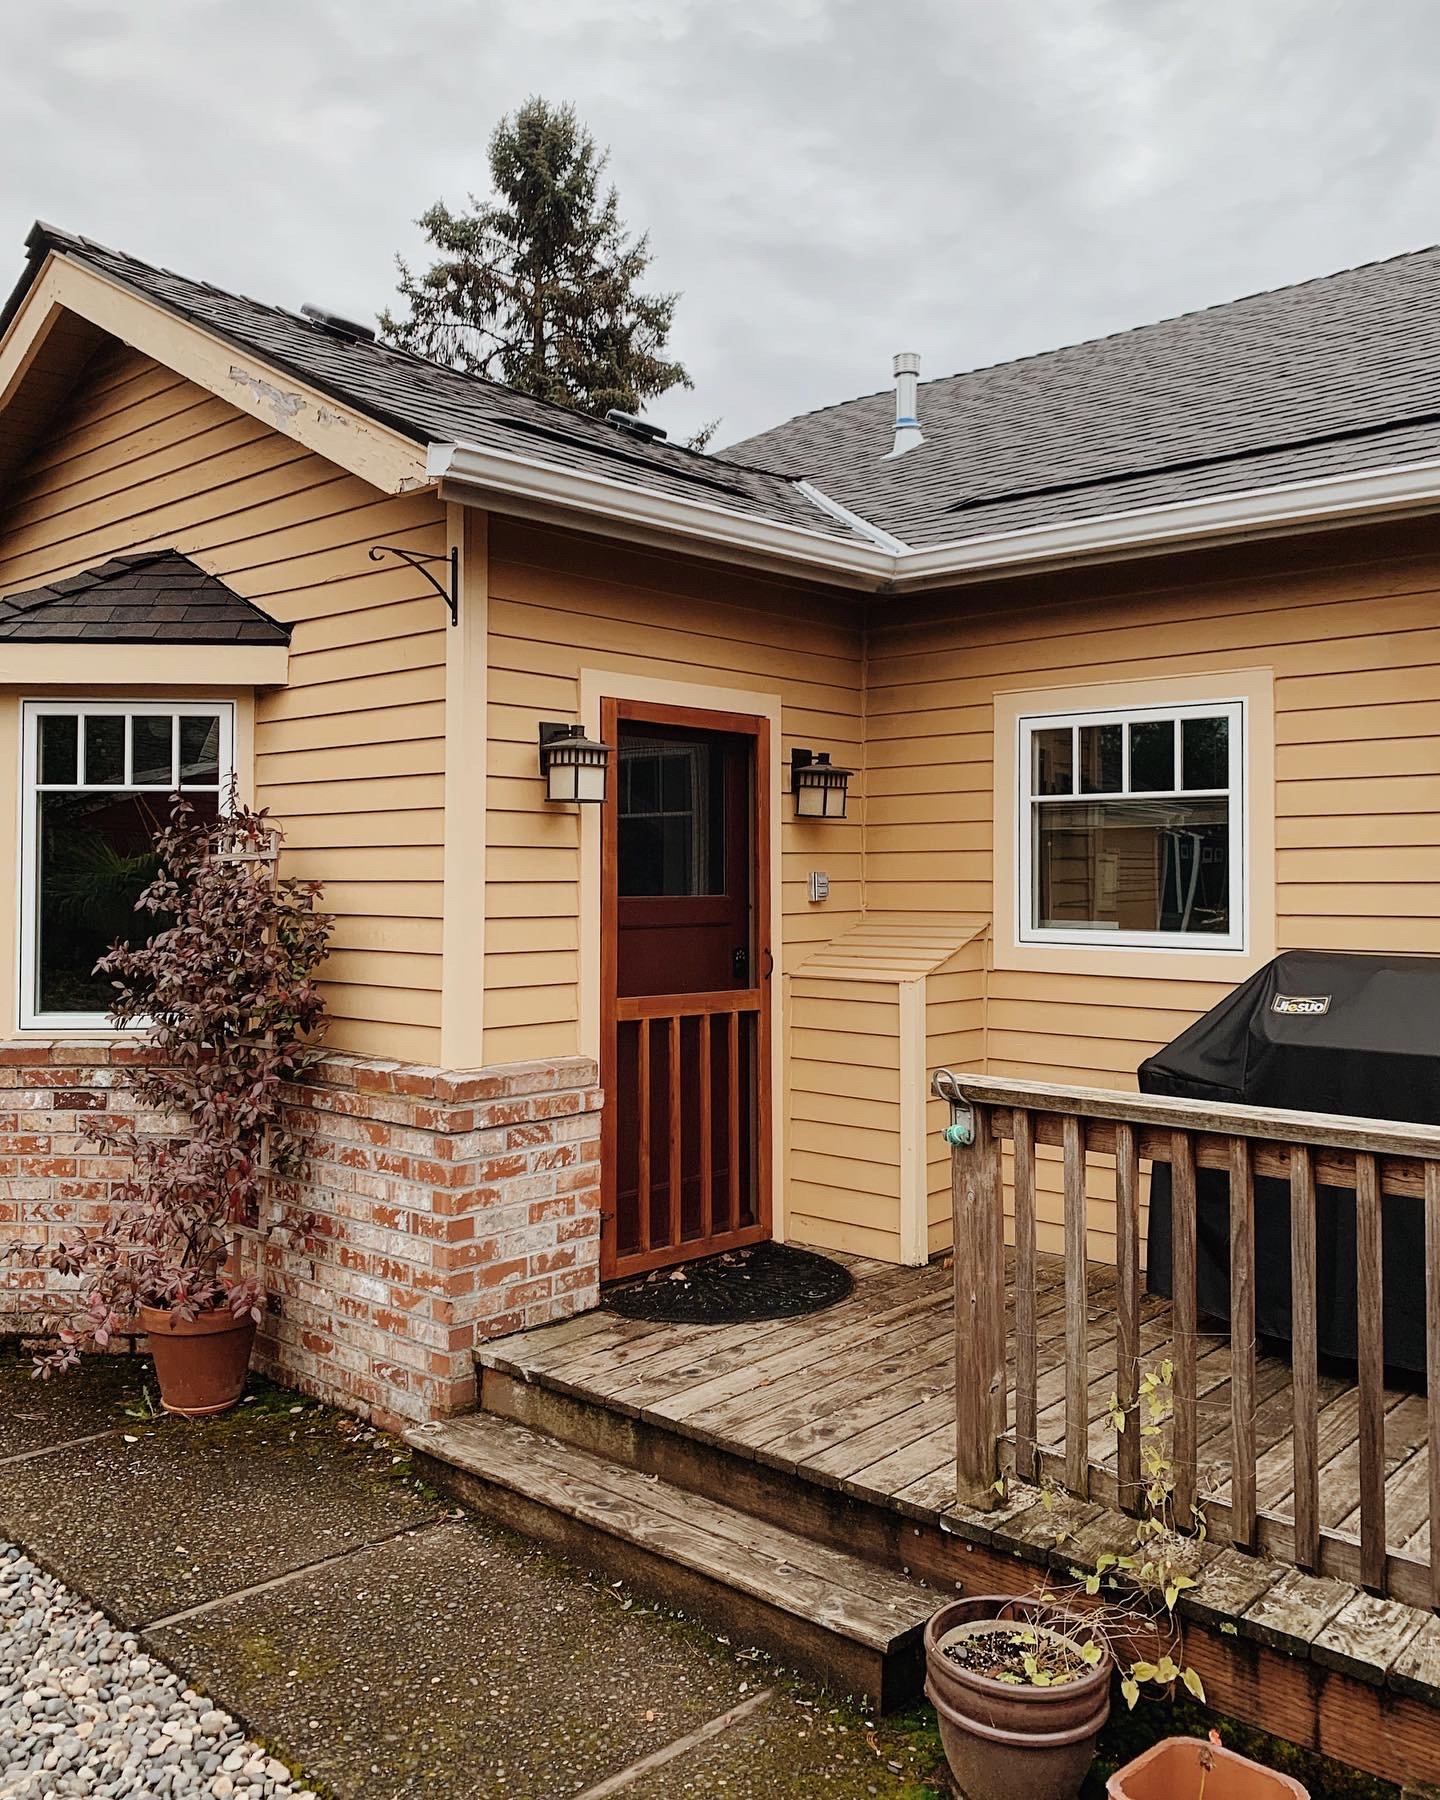
Yesterday a friend of ours commented on how this “house is lucky to have us taking care of it” and it really warmed my heart. This is a great house. And I happy to take care of it.

Until then… thanks for being here!


Follow